

Table of Contents
- Why Weekly UV Printer Nozzle Checks Matter
- What You'll Need Before Starting
- Step-by-Step Process for Performing a Nozzle Check
- Troubleshooting UV Printer Nozzle Check Issues
- UV Printer Nozzle Clogging Prevention Strategies
- Best Cleaning Solutions for UV Print Heads
- Common Mistakes to Avoid During Nozzle Maintenance
- Conclusion
- Frequently Asked Questions
Last Updated: September 21, 2026
Why Weekly UV Printer Nozzle Checks Matter
A UV printer nozzle check is a simple test that reveals whether your print head is firing correctly. You run the check, examine the test pattern, and spot any missing lines or gaps that signal trouble ahead.
Weekly checks catch problems early. A clogged nozzle that goes unnoticed for two weeks becomes a failed print run. A failed print run becomes lost revenue. The difference between a five-minute inspection and a production shutdown is often just one weekly test.
Most print shop owners treat nozzle checks as something to do when a problem appears. That's backwards. Weekly checks are your early warning system. They tell you when to clean before quality drops. They tell you when to call for support before your machine stops.
What You'll Need Before Starting
Gather these items before you begin your UV printer nozzle check:
- Your printer's test pattern or nozzle check function (built into your RIP software)
- Plain white paper or test media that your printer normally uses
- A bright light source or inspection lamp
- A magnifying glass (optional but helpful for spotting fine details)
- Your printer's user manual or quick-reference guide
- A notebook or digital log to record results
Some operators keep a laminated checklist next to the machine. Others use a simple spreadsheet to track weekly results. Either method works, consistency matters more than format.
Step-by-Step Process for Performing a Nozzle Check
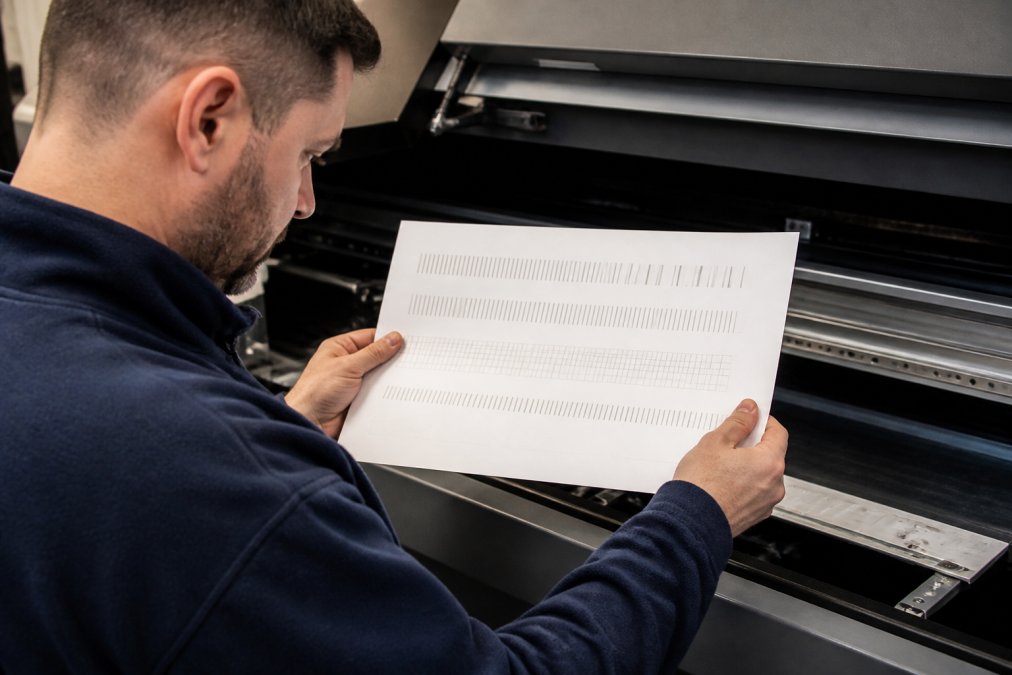
Step 1: Access Your Nozzle Check Function [Time: 2 minutes]
Open your RIP software and locate the nozzle check option. Most systems place this in the Maintenance or Tools menu. Select "Print Nozzle Check" and allow the printer to complete the test without interruption. The machine will fire all nozzles in a controlled pattern onto your test media.
Step 2: Retrieve and Inspect the Test Pattern [Time: 3 minutes]
Remove the printed test pattern carefully. Look at the pattern under bright light. You're checking for solid, continuous lines across the full width of the print head. Each colour channel should show consistent, unbroken output.
Step 3: Document What You See [Time: 2 minutes]
Compare the pattern to a reference image from your manual. Note any missing lines, gaps, or faint sections. Record the date, time, and observations in your log. This history helps you spot trends, a gradual decline signals preventive maintenance is needed soon.
Step 4: Decide Your Next Action [Time: 1 minute]
| Result | Action | Timeline |
|---|---|---|
| All lines solid and clear | Continue normal operation | Repeat next week |
| Minor gaps or faint lines | Run cleaning cycle tonight | Retest in 2 days |
| Multiple missing lines | Contact support or clean | Today if possible |
| Severe loss across channels | Stop printing | Call for service |
Troubleshooting UV Printer Nozzle Check Issues
A failed UV printer nozzle check doesn't always mean your print head is damaged. Sometimes it signals a simple fix. Other times it requires professional help.
Missing Lines on One Colour Only
If black lines appear solid but cyan shows gaps, the issue is isolated to one ink channel. This usually points to a partially clogged nozzle plate or low ink pressure in that line. Run your printer's automated cleaning cycle for that colour. Wait 30 minutes and retest. If lines remain missing, the nozzle plate may need professional cleaning.
Faint Lines Across All Colours
Faint output across every channel suggests low ink flow to the entire print head. Check your ink levels first, many systems reduce pressure when supplies run low. Refill if needed. If levels are full, run a deep cleaning cycle. This uses more ink but applies stronger pressure to clear blockages throughout the head.
Gaps That Appear and Disappear
Intermittent nozzle firing is frustrating because it's unpredictable. This often indicates air bubbles trapped in the ink lines or a failing electrical connection to the print head. Run a purge cycle to push air through the system. If the problem persists, the electrical connection may need inspection, this is best handled by a qualified technician.
No Output at All
If your test pattern shows no printing whatsoever, the issue is serious. Check that ink is actually reaching the print head by examining the ink tubes for blockages or disconnections. Verify the printer is in the correct mode and that your RIP software recognises the machine. If everything appears connected and powered, the print head may have failed electrically. This requires professional diagnosis.
UV Printer Nozzle Clogging Prevention Strategies
The best cure is prevention. A nozzle that never clogs saves you time, money, and frustration.
Use Quality Ink
Cheap ink often contains particles or inconsistent viscosity. These cause clogs faster than premium formulations. Your printer was engineered for specific ink properties. Using the correct ink type is the single most effective prevention step.
Run Purge Cycles Weekly
A purge cycle forces ink through the nozzles under pressure, clearing minor blockages before they become serious. Many operators run a purge every Friday afternoon. The machine sits idle over the weekend with clean nozzles ready for Monday morning.
Maintain Consistent Temperature
UV ink behaves differently at different temperatures. Cold ink becomes thick and flows poorly. Hot ink becomes thin and may not cure properly. Keep your print room between 18 and 24 degrees Celsius. Avoid placing the printer near windows or heating vents where temperature swings occur.
Cap the Print Head When Not in Use
If your printer has a capping station, use it. The cap seals the nozzle plate and prevents ink from drying out during idle periods. Even a few hours without a cap can allow ink to begin hardening in the nozzles. Always cap before shutting down for the day.
Print Regularly
A printer that runs daily stays healthier than one that sits idle for weeks. Regular printing keeps ink flowing and prevents drying. If your shop has slow periods, run test prints or maintenance cycles to keep the system active.
Best Cleaning Solutions for UV Print Heads
When a UV printer nozzle check reveals blockages, cleaning is your next move. The right approach depends on the severity.
Automated Cleaning Cycles
Your printer includes built-in cleaning routines. Start here. These cycles use the printer's own ink and pressure system to flush nozzles. They're safe, controlled, and effective for minor clogs. Run a standard clean first. If that doesn't work, try a deep clean, it uses more ink but applies stronger pressure.
Manual Flushing
For stubborn blockages, some operators manually flush the print head using a syringe filled with cleaning fluid. This requires care and knowledge of your specific printer model. Incorrect technique can damage electrical components or force blockages deeper into the system. If you're not confident, skip this step and call a professional.
Professional Cleaning Service

Laserprints offers a Printhead Cleaning Service for print heads that resist standard cleaning. Our technicians use specialist equipment and chemical processes to recover blocked nozzles. The service costs £49.99 and typically takes five working days.
Common Mistakes to Avoid During Nozzle Maintenance
Operators often damage their print heads by rushing maintenance or using incorrect techniques.
Running Nozzle Checks Too Frequently
Weekly checks are good. Daily checks waste ink and wear the nozzle plate unnecessarily. Each nozzle check fires thousands of tiny droplets. Excessive testing accelerates wear. Stick to weekly unless you're troubleshooting an active problem.
Ignoring Faint Lines
A nozzle that fires weakly today will be completely blocked tomorrow. Many operators ignore faint output and keep printing. This accelerates clogging and forces you into emergency cleaning later. Address faint lines immediately with a cleaning cycle.
Using Wrong Cleaning Fluids
Never use water or generic solvents on UV print heads. These can damage electrical components or leave residue that causes worse clogs.
Forcing Blocked Nozzles
Skipping Documentation
Conclusion
Weekly UV printer nozzle checks take five minutes and prevent days of downtime. The process is straightforward: run the test, inspect the pattern, document the result, and act if needed.
Frequently Asked Questions
Why is a weekly nozzle check critical for UV printers?
Weekly UV printer nozzle checks catch blockages before they affect print quality or damage the printhead. Blocked nozzles create gaps in your output, reduce colour accuracy, and force you to run expensive cleaning cycles. Early detection prevents costly downtime and extends printhead life. For production managers running high-volume jobs, a five-minute weekly check prevents the £2,000+ losses that come from unplanned equipment failures.
What should a perfect UV printer nozzle check pattern look like?
A perfect nozzle check shows solid, evenly-spaced horizontal lines with no gaps, breaks, or missing sections. Each colour channel (cyan, magenta, yellow, black, and any specialty inks) should print completely and uniformly. If you see dropouts, thin lines, or missing segments, those indicate blocked nozzles that need immediate attention. Compare your test print to your printer's reference chart to identify which nozzles are failing.
How do I interpret gaps in my UV printer nozzle check?
Gaps indicate blocked or partially blocked nozzles. Small, isolated gaps may respond to a standard cleaning cycle, whilst larger sections of missing lines suggest deeper blockages. If gaps persist after two cleaning attempts, the printhead may need professional servicing. Laserprints offers a Printhead Cleaning Service (£49.99) for contaminated or partially blocked printheads, with specialist techniques to recover nozzle performance within five working days.
How often should I perform a deep clean versus a standard nozzle check?
Perform a nozzle check weekly as part of routine maintenance. Run an automatic cleaning cycle only if the nozzle check shows gaps or poor performance. Deep cleaning, using manual flushing or specialist solutions, should happen monthly or when standard cleaning fails. Over-cleaning wastes ink and can damage nozzles, so use deep cleaning only when necessary. If problems persist, professional workshop cleaning becomes more cost-effective than repeated failed attempts.