

Table of Contents
- How Temperature Impacts UV Printer Performance
- UV Printer Humidity Requirements and Ink Curing
- Dust, Air Quality and Print Head Damage
- Preventing Print Head Clogging in UV Printers
- Extending the Lifespan of UV Printer Components
- Creating a Controlled Environment for Consistent Results
- Monitoring and Maintenance: Your Environmental Defence Strategy
- Frequently Asked Questions
Last Updated: September 22, 2026
How the UV printer environment affects performance is one of the most overlooked factors in production downtime. Most facilities focus on maintenance schedules and spare parts, but they miss the invisible forces that degrade equipment daily. Temperature swings, humidity spikes, dust accumulation, and air quality issues don't just slow your printer, they damage the core components that keep production running. At Laserprints, we understand the critical role environmental control plays in separating shops with consistent output from those fighting constant breakdowns.
The good news is that controlling your environment doesn't require expensive overhauls. It requires understanding what each factor does to your equipment and then building simple systems to manage it. This guide covers the conditions within a UV printer environment that affect performance, what happens when they drift, and how to create a workspace where your equipment thrives instead of merely surviving.
How Temperature Impacts UV Printer Performance
Temperature is the single most critical environmental factor for UV printers. UV inks cure through chemical reaction when exposed to light, and temperature directly affects how quickly that reaction happens. Too cold, and curing slows or stalls entirely. Too hot, and the ink begins curing before it even reaches the print head.
Most UV printers operate best between 18°C and 25°C. Outside this range, problems emerge quickly. Below 15°C, ink viscosity increases, causing poor flow through the nozzles and inconsistent colour saturation. Above 28°C, premature curing begins in the ink supply lines, leading to blockages and wasted material.
Thermal shock is equally damaging. If your facility heats overnight and cools during the day, the repeated expansion and contraction of internal components creates micro-fractures in solder joints and seals. A single temperature swing of 10°C per day, sustained over weeks, can crack a print head beyond repair.
Common mistakes include:
- Running the printer in an unheated workshop overnight
- Placing the printer near windows or external doors
- Ignoring seasonal temperature changes
- Failing to warm up the printer before heavy production runs
The fix is straightforward: maintain stable temperature year-round. Insulate your print room, use a thermostat to hold steady conditions, and allow 30 minutes of warm-up time before starting production. If you're in a facility with significant temperature variation, a dedicated environmental monitoring system alerts you when conditions drift.
UV Printer Humidity Requirements and Ink Curing
Humidity affects both the ink and the substrate. UV inks contain solvents that evaporate, and humidity controls how quickly that happens. In dry air (below 30% relative humidity), solvents evaporate too fast, causing ink to thicken in the lines and nozzles to clog. In humid air (above 60%), evaporation slows, and wet ink sits on the substrate longer, reducing cure speed.
The ideal range for most UV printers is 40-55% relative humidity. Within this band, solvents evaporate at the right pace, ink flows smoothly, and UV light cures the material properly.
Low humidity environments create visible problems:
- Nozzles clogging within hours of shutdown
- Print heads requiring daily cleaning cycles
- Inconsistent colour density across prints
- Substrate warping as moisture is drawn from the material
High humidity brings different issues:
- Slow or incomplete curing
- Ink bleeding into substrate
- Adhesion problems on certain materials
- Mould growth in stored substrates and ink containers
Many UK facilities underestimate humidity because the climate feels dry indoors. But winter heating creates extremely low humidity (sometimes below 20%), while summer brings moisture that stalls curing. Seasonal adjustment is essential.
Control humidity by:
- Installing a dehumidifier in winter months
- Adding a humidifier or water source in dry seasons
- Monitoring relative humidity continuously
- Storing ink in sealed containers away from temperature extremes
Dust, Air Quality and Print Head Damage
Dust is an invisible killer in UV printing environments. Particles settle on the print head, substrate, and inside the ink delivery system. A single dust particle lodged in a nozzle can block it permanently. Larger dust accumulation clogs the air intake vents on your UV lamp, reducing light output and slowing cure times.
Air quality extends beyond visible dust. Chemical vapours from cleaning solvents, adhesives, and other materials in the workshop interfere with ink curing and damage seals in the printer's internal plumbing. Particulate matter from cutting, sanding, or engraving operations (if you run multiple production lines) settles everywhere.
The damage happens in stages:
- Dust accumulates on the print head nozzle plate
- Nozzles begin missing, creating gaps in the print
- Pressure builds as blockages increase
- Ink backs up into the delivery lines
- Print head fails or requires professional cleaning
Professional cleaning services like Laserprints' Printhead Cleaning Service can recover partially blocked heads, but prevention is far cheaper. A blocked print head costs £49.99 to clean, but a replacement head can cost ten times that amount.

Prevent dust damage by:
- Installing air filtration in your print room
- Using dust covers when the printer is idle
- Scheduling regular printhead cleaning cycles
- Separating your UV printer from cutting or sanding operations
- Keeping the workspace swept and wiped down daily
Preventing Print Head Clogging in UV Printers
Print head clogging is the most common failure in UV printing. It happens when ink dries inside the nozzles, when dust blocks flow, or when environmental conditions cause ink to thicken. Prevention is far easier than cure.
Clogging starts with environmental neglect. A print head left in a 10°C room overnight will have thickened ink by morning. A week in low humidity creates a crust inside the nozzles. Dust particles settle into the nozzle plate and harden.
The first sign is usually missing lines or dots in your print. This means one or more nozzles are blocked. At this stage, you have days before the blockage spreads and the entire head fails.
Prevent clogging with:
- Daily print head cleaning cycles (your printer likely has an automated function)
- Parking the print head in a sealed cap when idle
- Running a purge cycle before starting production
- Maintaining stable temperature and humidity
- Using quality ink and replacing it before the cartridge is completely empty (old ink oxidises and thickens)
If clogging does occur, don't delay. A blocked head that sits for a week becomes harder to recover. Laserprints offers Printhead Cleaning Service with specialist techniques including controlled chemical cleaning and directional flushing. Most partially blocked heads recover, but permanent damage can prevent a full recovery.
Extending the Lifespan of UV Printer Components
Environmental stress is cumulative. A print head exposed to poor conditions doesn't fail overnight, it degrades slowly until it reaches a breaking point. The same applies to pumps, seals, and electrical components. Controlling your environment extends the working life of every part.
A well-maintained UV printer in a controlled environment can significantly extend its operational lifespan before major component replacement becomes necessary, whereas printers in uncontrolled environments may experience failures much sooner.
Key components affected by environment:
Print heads degrade fastest. They're exposed to temperature shifts, humidity changes, and dust. Stable conditions can double their lifespan.
Ink pumps fail when ink thickens or contaminates.
To extend component lifespan:
- Maintain stable temperature within 18-25°C
- Keep humidity between 40-55%
- Install air filtration and dust management
- Schedule preventive maintenance regularly
- Replace consumables (ink, seals) before they fail
- Monitor environmental conditions continuously
| Environmental Factor | Ideal Range | Impact When Out of Range |
|---|---|---|
| Temperature | 18-25°C | Ink flow issues, curing problems, component cracking |
| Humidity | 40-55% | Nozzle clogging, slow cure, mould growth |
| Dust/Particulates | Minimal | Print head blockage, lamp dimming, seal damage |
| Air Quality | Clean, solvent-free | Ink curing interference, seal corrosion |
Creating a Controlled Environment for Consistent Results
Building a controlled print environment doesn't require a dedicated clean room. It requires understanding what conditions matter and then installing simple systems to maintain them.
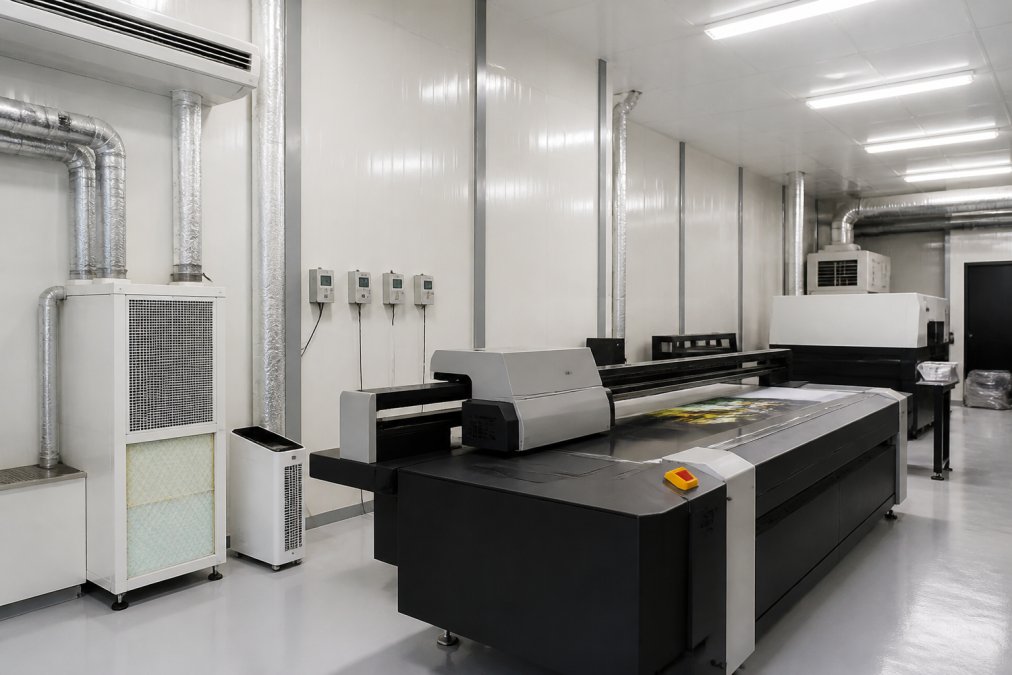
Next, install the basics:
- A quality thermostat to hold temperature steady
- A humidity monitor that alerts when levels drift
- Air filtration to remove dust and particulates
- Insulation to reduce external temperature influence
- Dust covers for equipment when idle
Then, establish routines:
- Check temperature and humidity before starting production
- Run a 30-minute warm-up cycle if the printer has been idle overnight
- Clean the print head nozzle plate daily
- Replace air filters monthly
- Keep the workspace swept and organised
Monitoring and Maintenance: Your Environmental Defence Strategy
Monitoring environmental conditions is not optional, it's the foundation of equipment reliability. Without data, you're flying blind. You don't know when conditions drift until your printer fails.
Pair monitoring with preventive maintenance. A maintenance schedule that ignores environment is incomplete. Your maintenance plan should include:
- Environmental checks at the start of each shift
- Dust removal and air filter replacement
- Printhead cleaning cycles (daily or weekly depending on use)
- Ink system purging before production
- Seasonal adjustments for temperature and humidity
Frequently Asked Questions
What is the ideal temperature range for a UV printer room?
Most UV printers operate optimally between 18-25°C. Temperatures below 15°C slow ink curing and can cause adhesion problems, whilst temperatures above 30°C accelerate curing too quickly, risking incomplete ink flow and print defects. Fluctuations of more than 5°C within a shift create dimensional instability in substrates and inconsistent colour output. Maintain steady temperature through climate control and position your printer away from direct sunlight, heating vents, and external walls.
How does humidity affect UV ink curing and print quality?
Maintaining appropriate humidity levels is crucial for UV printing. Low humidity can cause static build-up, leading to ink misting and poor adhesion, while high humidity can trap moisture in the substrate, preventing proper ink cure and causing sticky, smudged prints. Moisture can also encourage corrosion in electrical components and ink nozzles. Use a hygrometer to monitor levels and consider a dehumidifier or humidifier to maintain an optimal range consistently.
Can dust and poor air quality damage UV print heads?
Yes. Airborne dust, fibres, and particles settle on nozzle plates and inside ink channels, causing blockages and poor nozzle performance. Contaminated air also accelerates ink oxidation and chemical degradation. Clean surrounding areas regularly and use protective covers on idle equipment. If your print head becomes partially blocked due to contamination, our Printhead Cleaning Service (£49.99) uses specialist techniques to recover nozzle performance.
What environmental steps prevent print head clogging in UV printers?
Maintain consistent temperature and humidity, use high-quality, filtered ink, and run nozzle checks daily. Minimise dust through regular facility cleaning and air filtration. Avoid leaving the printer idle for extended periods to keep ink flowing through nozzles. Store ink cartridges in sealed, temperature-controlled conditions. If clogging occurs despite prevention, seek professional cleaning rather than attempting DIY flushing, which can cause permanent damage.