

Table of Contents
- Why Preventative Maintenance for UV Printers Matters
- Daily Maintenance Tasks for UV Printers
- Weekly and Monthly Maintenance Routines
- UV Printer Printhead Cleaning Procedure
- Creating Your UV Printer Maintenance Schedule Template
- Understanding the Cost of Professional Industrial Printer Repair
- Common Maintenance Mistakes and How to Avoid Them
- Troubleshooting Guide: When to Call a Professional
- Frequently Asked Questions
Last Updated: September 2, 2026
Why Preventative Maintenance for UV Printers Matters
The difference between smooth operations and costly downtime comes down to one thing: maintaining equipment before it breaks. Preventative maintenance for UV printers isn't optional, it's the foundation of operational reliability.
When UV printers fail unexpectedly, costs stack up fast. Production halts. Orders miss deadlines. Customer relationships suffer. A blocked printhead caught during routine maintenance might cost £49.99 for professional cleaning. Left unattended, the same printhead could require full replacement costing hundreds, plus days of downtime.
UV printers are precision instruments combining complex optical systems, delicate printheads, and calibrated ink delivery mechanisms. When one element degrades, dried ink in a nozzle, dust on a lens, or pressure inconsistencies, the entire output suffers. Print quality drops. Throughput slows. Eventually, the machine fails entirely.
Preventative maintenance creates predictability. You schedule maintenance during downtime rather than having it forced upon you during peak production. Your team gains confidence in equipment reliability. Your customers receive consistent quality. That consistency separates print shops that grow from those that struggle.
Daily Maintenance Tasks for UV Printers
Daily checks take minutes but prevent hours of troubleshooting later. Start each working day by running a test print and comparing it to a baseline sample. Look for gaps in colour coverage, lighter or darker colours, banding patterns, or horizontal lines, early warning signs of ink delivery failure.
Inspect the printhead visually. UV ink should be clean and consistent in colour. Dried ink crusted around nozzles or darkened, separated ink indicates moisture or contamination. The printhead is one of the most expensive components; catching issues early prevents catastrophic damage.

Check ink levels in all reservoirs. Running on empty or near-empty can damage the pump system and force air into ink lines. If one colour drops faster than others, that colour's nozzles may be partially blocked.
Examine the platen for debris. Wipe down the surface with a soft, lint-free cloth. Accumulated debris can scratch media, contaminate the printhead, or interfere with the height sensor.
Finally, listen to the machine. UV printers have a characteristic operating sound. Grinding, squealing, or unusual clicking indicates mechanical friction, motor strain, or physical obstruction. Investigate immediately rather than hoping the problem resolves itself.
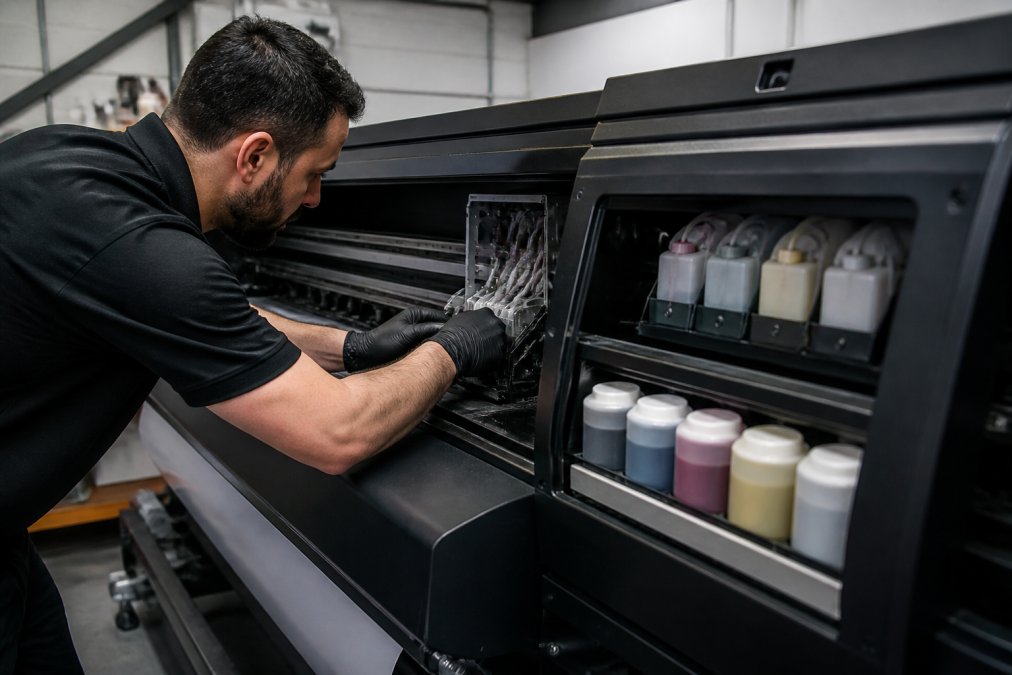
These five daily checks take roughly 10 minutes total and require no special tools. They're the frontline defence against problems that could cascade into major failures.
Weekly and Monthly Maintenance Routines
Weekly maintenance goes deeper than daily checks. Clean the exterior and surrounding area with compressed air (at low pressure) and a damp microfibre cloth to remove ink splatter and dust. Dust accumulation can be drawn into cooling vents, affecting internal temperatures.
Inspect ink tubes and connections for leaks or looseness. Check that all fittings are hand-tight. If you find a leak, contact a professional service provider like Laserprints rather than attempting field repair.
Clean the encoder strip, a thin, reflective strip running the length of the carriage rail that tells the machine where the printhead is positioned. Dust or ink splatter causes misaligned prints. Use a soft, dry cloth only; never use solvents.
Check the UV lamp. UV lamps degrade over time and eventually stop providing sufficient curing energy (peer-reviewed research). If prints feel sticky or not fully cured, the lamp may be failing. Most systems have an hour counter; check manufacturer specifications for replacement timing.
Monthly maintenance is more comprehensive. Access your printer's maintenance menu and run an automated nozzle check. If you see gaps or missing lines, some nozzles are blocked. Run the printer's built-in cleaning cycle, starting with standard clean and progressing to deep clean if needed. If problems persist, the printhead requires professional attention.
Check pressure readings in your ink delivery system (if displayed). Normal ranges vary by model, but consistency matters. If pressure in one channel is significantly higher or lower than others, that indicates blockage, air in the line, or a failing pump component. Document readings to predict when service will be needed.
Inspect carriage movement by manually moving the printhead from end to end with the printer powered off. It should move smoothly without resistance or grinding. If movement is stiff or noisy, the rail may need lubrication or have debris caught in the mechanism.
UV Printer Printhead Cleaning Procedure
The printhead is the heart of your UV printer. Clean it only when nozzle checks reveal blocked or weak nozzles that don't respond to automated cleaning cycles. Attempting unnecessary cleaning can damage the printhead.
For valuable printheads or persistent blockages, professional cleaning is the safer choice. Laserprints offers a Printhead Cleaning Service (£49.99) where experienced engineers use specialist techniques to recover blocked nozzles without damage.

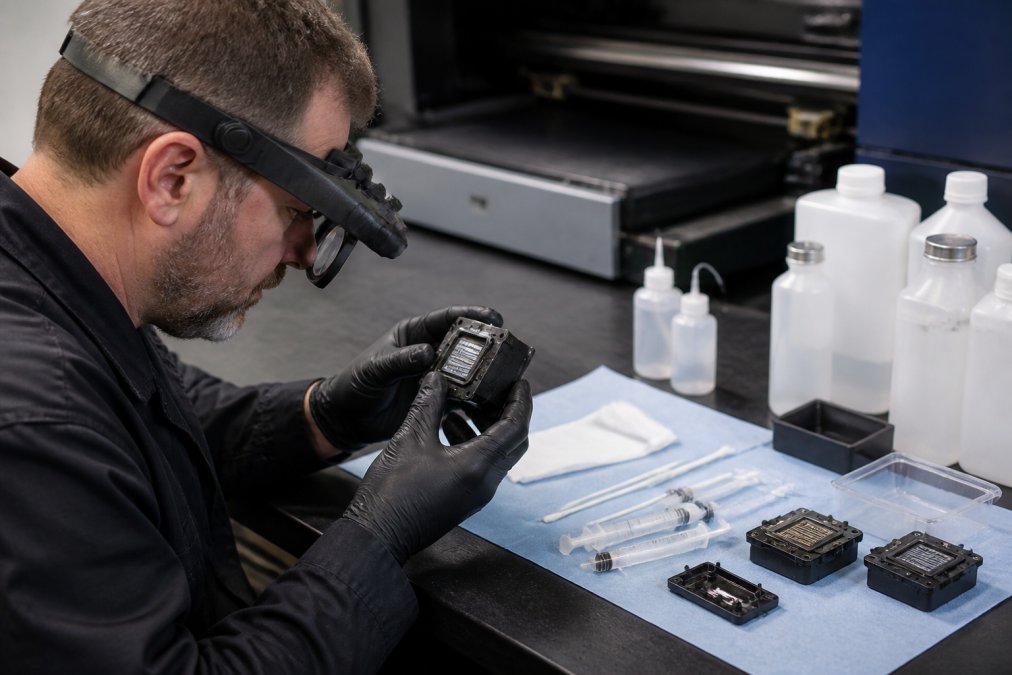
If you attempt manual soaking at home, remove the printhead and place it nozzle-side down in approved printhead cleaning solution (not water or harsh solvents) for 15-30 minutes. Gently clean the nozzle plate with a soft brush using light circular motions. Rinse thoroughly with distilled water and air-dry completely before reinstalling.
Never soak for more than a few hours, as extended exposure damages internal seals (peer-reviewed research). Never use high-pressure water or compressed air to force cleaning solution through nozzles. Never attempt to clean internal channels yourself; these require specialist equipment.
After reinstalling, run a nozzle check immediately. If blockage persists, the printhead likely has internal damage and requires professional replacement.
Prevention is far more effective than cure. Blocked nozzles develop when ink dries inside the system during extended downtime or when ink quality deteriorates. Always cap the printhead when shut down for more than a few hours. Use fresh ink and store it properly. Keep the environment clean and dry.
Creating Your UV Printer Maintenance Schedule Template
A written maintenance schedule keeps everyone accountable and ensures nothing gets overlooked. Create a simple template your team can follow and sign off on.
| Task | Frequency | Responsible | Completion Date | Notes |
|---|---|---|---|---|
| Visual printhead inspection | Daily | Operator | [Date] | Check for dried ink or discolouration |
| Test print quality check | Daily | Operator | [Date] | Compare to baseline; note any gaps or banding |
| Ink level verification | Daily | Operator | [Date] | Record levels for all colour channels |
| Platen/platform cleaning | Daily | Operator | [Date] | Remove debris and splatter |
| Exterior and vent cleaning | Weekly | Maintenance | [Date] | Use compressed air and microfibre cloth |
| Ink tube inspection | Weekly | Maintenance | [Date] | Check for leaks or loose connections |
| Encoder strip cleaning | Weekly | Maintenance | [Date] | Wipe gently with dry cloth only |
| UV lamp inspection | Weekly | Maintenance | [Date] | Check hour counter; note any dimming |
| Nozzle check test | Monthly | Maintenance | [Date] | Run test pattern; record results |
| Printhead cleaning cycle | Monthly | Maintenance | [Date] | Use standard or deep clean as needed |
| Pressure reading check | Monthly | Maintenance | [Date] | Record readings; compare to baseline |
| Carriage movement inspection | Monthly | Maintenance | [Date] | Check for smooth motion and noise |
Print this template and post it near the printer. Review completed entries weekly or monthly. If patterns emerge, such as nozzle blockages every three weeks, adjust your cleaning frequency or investigate the underlying cause.
Understanding the Cost of Professional Industrial Printer Repair
Repair costs vary depending on what's failed and urgency. Laserprints charges £125.00 for a Call-Out Service, which includes diagnosis and repair if the issue can be resolved on-site.

For more extensive work, Laserprints offers an In-House Machine Repair Service starting at £100.00, covering full inspection, diagnosis, and repair in the workshop. This is suitable for problems requiring specialised equipment or extended work time.
Parts replacement adds to total cost. A replacement printhead costs £200-£600 depending on the model. A UV lamp might be £150-£300. Smaller components like the XP600 UV Ink Damper (£12.49) are more affordable but still represent expenses.
Remote support is cost-effective for software-related issues. Laserprints offers a Remote Support Service at £24.99 for video consultation and remote troubleshooting, ideal for configuration issues or driver problems.
The financial case for preventative maintenance is clear: spending £50-£100 monthly on routine maintenance prevents £500-£2,000 emergency repairs. Beyond direct costs, emergency repairs mean unplanned downtime and lost production.
Document all service visits and repairs. Keep records of what was done, when, and by whom. This history is invaluable if problems recur and supports warranty claims.
Common Maintenance Mistakes and How to Avoid Them
Using the wrong cleaning solution. Never use water or harsh industrial solvents. Water causes corrosion and doesn't dissolve dried UV ink effectively. Harsh solvents damage seals and internal components. Always use cleaning solution specifically formulated for UV ink systems.
Ignoring early warning signs. A slight colour shift, faint grinding sound, or slower throughput are messages your printer is sending. Act on them immediately. A 10-minute investigation now prevents catastrophic failure later.
Skipping the nozzle check. Always run a nozzle check before cleaning. If all nozzles are firing, skip cleaning. If some are blocked, then clean. This saves ink, extends printhead life, and provides data about whether cleaning worked.
Over-tightening connections. Hand-tight is correct. Over-tightening cracks plastic connectors and causes leaks. If a fitting keeps loosening, the threads are damaged and the fitting needs replacement.
Attempting repairs beyond your skill level. Know your limits. A professional service call costs money, but a botched repair costs far more.
Neglecting the environment. Keep the area around the machine clean. Use a dust cover when not in use. Maintain reasonable temperature and humidity levels if possible. These steps extend equipment life significantly.
Forgetting to document maintenance. Write everything down: what was done, when, by whom, and results. This transforms maintenance from vague activity into measurable practice.
Troubleshooting Guide: When to Call a Professional
Problems you can likely solve yourself: Nozzle check shows blocked nozzles resolved by cleaning cycle. Ink levels are low. Platen is dirty. Test print shows minor colour inconsistency that disappears after cleaning.
Problems warranting quick investigation: Printer won't power on, check it's plugged in and circuit breaker hasn't tripped. Print is severely misaligned, check media is loaded straight and height sensor isn't obstructed. A colour is missing, verify the ink reservoir isn't empty. No output at all, run nozzle check.
Problems requiring professional help immediately: Grinding or squealing sounds that don't stop after cleaning. Ink leaking from connections or the machine. Carriage won't move or moves with severe resistance. Burnt or discoloured output even after cleaning. Nozzles not firing despite cleaning cycles. UV lamp not curing properly. Unrecognised error codes.
When calling a professional, provide as much information as possible: the symptom, when it started, what you've already tried, and nozzle check results. This speeds diagnosis and often means the technician brings the right parts on the first visit. Laserprints' Call-Out Service (£125.00) includes diagnosis, and many issues are resolved during that first visit.
Preventative maintenance for UV printers is the difference between a printing operation that thrives and one that constantly struggles with downtime and emergency repairs. Start with daily checks. Build weekly and monthly routines into your team's workflow. Track everything. When problems arise beyond your capability, reach out to professionals who understand your equipment. Laserprints specialises in keeping UV print engines running smoothly for UK manufacturers and print service providers. Whether you need routine maintenance guidance, professional cleaning, or emergency repair, our team is equipped to support your operation. Get started with preventative maintenance today and protect your investment in professional-grade printing equipment.
Frequently Asked Questions
Q: How often should you perform preventative maintenance on a UV printer?
A: Daily maintenance takes 10-15 minutes and includes nozzle checks and ink level monitoring. Weekly tasks require 30-45 minutes and cover deeper cleaning and component inspection. Monthly maintenance involves thorough printhead assessment and calibration checks. Annual professional servicing ensures optimal performance and catches wear before it causes breakdown. Skipping any tier increases downtime risk significantly.
Q: What is the UV printer printhead cleaning procedure, and can I do it myself?
A: Basic cleaning involves using approved solvents to gently clear blocked nozzles with soft brushes or ultrasonic equipment. However, improper technique risks permanent damage to the printhead. Professional printhead cleaning services like Laserprints' Printhead Cleaning Service (£49.99) use specialist techniques and equipment to restore ink flow safely. If you're unsure, professional cleaning is worth the investment to avoid costly replacement.
Q: What is the cost of professional industrial printer repair, and how does it compare to preventative maintenance?
A: Emergency repairs typically cost £125-£300+ per call-out, plus parts and labour for complex faults. A single unplanned breakdown can cost thousands in lost production time. Preventative maintenance spreads costs predictably: remote support runs £24.99, call-outs start at £125, and in-house servicing begins at £100. Regular maintenance prevents expensive emergencies and extends equipment life by years, making it far more cost-effective than reactive repairs.
Q: What signs indicate my UV printer needs professional servicing?
A: Watch for inconsistent print quality, colour banding, slow curing, unusual noises, or ink leaks. Clogged nozzles that don't respond to standard cleaning, uneven ink distribution, or failed nozzle checks are red flags. If maintenance tasks don't resolve the issue within one attempt, contact a professional. Early intervention prevents minor problems from becoming catastrophic failures that halt production entirely.
Q: How does humidity affect UV printer maintenance requirements?
A: High humidity increases ink evaporation rates and promotes mould growth in ink systems, requiring more frequent nozzle checks and deeper cleaning. Low humidity accelerates ink drying in the printhead, causing blockages. Maintain workshop humidity between 40-60% to reduce maintenance frequency. In humid climates, weekly printhead cleaning becomes essential rather than monthly, and you may need additional ventilation to protect UV components.
Q: Can I create a UV printer maintenance schedule template myself, or should I use a professional one?
A: A basic template should include daily nozzle checks, weekly deep cleaning, monthly calibration, and annual professional servicing. However, templates tailored to your specific printer model, ink type, and usage volume are far more effective. Laserprints can help you develop a customised maintenance schedule template based on your equipment and production demands, ensuring you address the maintenance needs that matter most to your operation.
This article was written using GrandRanker