

Table of Contents
- What Causes UV Printer Ink Adhesion Failures
- Step 1: Diagnose the Root Cause of Poor Adhesion
- Step 2: Prepare Surfaces Using Best Primers for UV Printing on Glass and Metal
- Step 3: Perform UV Ink Adhesion Test Methods
- Step 4: Troubleshooting UV Flatbed Printer Ink Flaking
- Step 5: Clean Your Printhead and Ink System
- When to Call in Professional Support
- Frequently Asked Questions
Last Updated: 4 October 2026
What Causes UV Printer Ink Adhesion Failures
UV printer ink adhesion issues stem from a handful of recurring problems. Most often, the root cause isn't the ink itself, it's what happens before the ink ever hits the substrate.
Poor surface preparation tops the list. If your substrate isn't clean, properly primed, or compatible with UV ink, adhesion fails immediately. Dust, oils, moisture, and residue act as barriers between the ink and the surface.
Incorrect UV curing is another major culprit. Under-curing leaves ink partially polymerised and weak. Over-curing can actually damage adhesion by causing the ink to cure too quickly before it properly wets the substrate surface.
Printhead issues also contribute. If your nozzles are partially blocked or firing inconsistently, you get uneven ink application.
Finally, substrate compatibility problems cause silent failures. Some materials, particularly certain plastics and coated metals, require specific primers or surface treatments.
Understanding these causes helps you diagnose problems faster and fix them the first time.
Step 1: Diagnose the Root Cause of Poor Adhesion
Start your troubleshooting by identifying exactly where adhesion is failing. This narrows your fix dramatically.
Check substrate cleanliness and surface contamination
Begin with the surface itself. Remove the printed substrate and inspect it under good lighting. Look for visible dust, fingerprints, oils, or residue.
Run your finger across the printed area. Does the ink feel firmly bonded, or does it shift slightly under light pressure? Loose ink suggests surface contamination or inadequate priming.
Clean a test area with isopropyl alcohol and a lint-free cloth. Print a small test patch on the cleaned section. If adhesion improves dramatically, contamination was your problem. If it doesn't improve, move to the next diagnostic step.
Check your substrate storage too. Materials left uncovered or stored in humid conditions pick up moisture and dust. Store substrates in sealed, climate-controlled areas whenever possible.
Verify UV lamp intensity and curing settings
Poor adhesion often comes from incorrect curing rather than surface problems. Your UV lamp intensity and exposure time must match both your ink type and substrate material.
Locate your printer's curing settings. Note the current lamp intensity percentage and exposure time in milliseconds. Most manufacturers recommend specific ranges for different materials, check your printer documentation or contact your ink supplier.
Test your lamp output using a UV intensity meter if you have one available. Lamps degrade over time, and a lamp running at 60% of its rated output will undercure ink consistently. If your meter shows output below 80% of rated specs, the lamp needs replacement soon.
Adjust settings incrementally. Increase curing time by 50 milliseconds and retest. If adhesion improves, you've found part of the solution. If it worsens, reduce time instead, over-curing can damage adhesion just as badly as under-curing.
Document your successful settings. Once you find the right combination, consistency becomes easier to maintain.
Step 2: Prepare Surfaces Using Best Primers for UV Printing on Glass and Metal
Proper surface preparation is where adhesion battles are won or lost. The right primer transforms a problematic substrate into one that holds ink reliably.
Selecting the right primer for your substrate type
Different materials need different primers. Glass requires a primer designed for non-porous, slick surfaces. Metal needs a primer that handles oxidation and corrosion. Plastic demands a primer compatible with the specific polymer type.
For glass, use a UV primer formulated specifically for glass adhesion. These primers contain silane compounds that chemically bond to glass surfaces, creating a receptive layer for ink. Standard primers won't work, they'll sit on top of the glass rather than adhering to it.
Metal substrates benefit from primers that include rust inhibitors and corrosion resistance. Aluminium, steel, and anodised metals each have slightly different requirements. Check your primer manufacturer's compatibility chart to match the exact metal type you're printing.
Plastic substrates are trickier. ABS, PVC, and polycarbonate all behave differently. Some plastics require a pre-treatment step, light sanding or plasma treatment, before primer application. Verify compatibility before committing to a large job.
Application technique and drying time
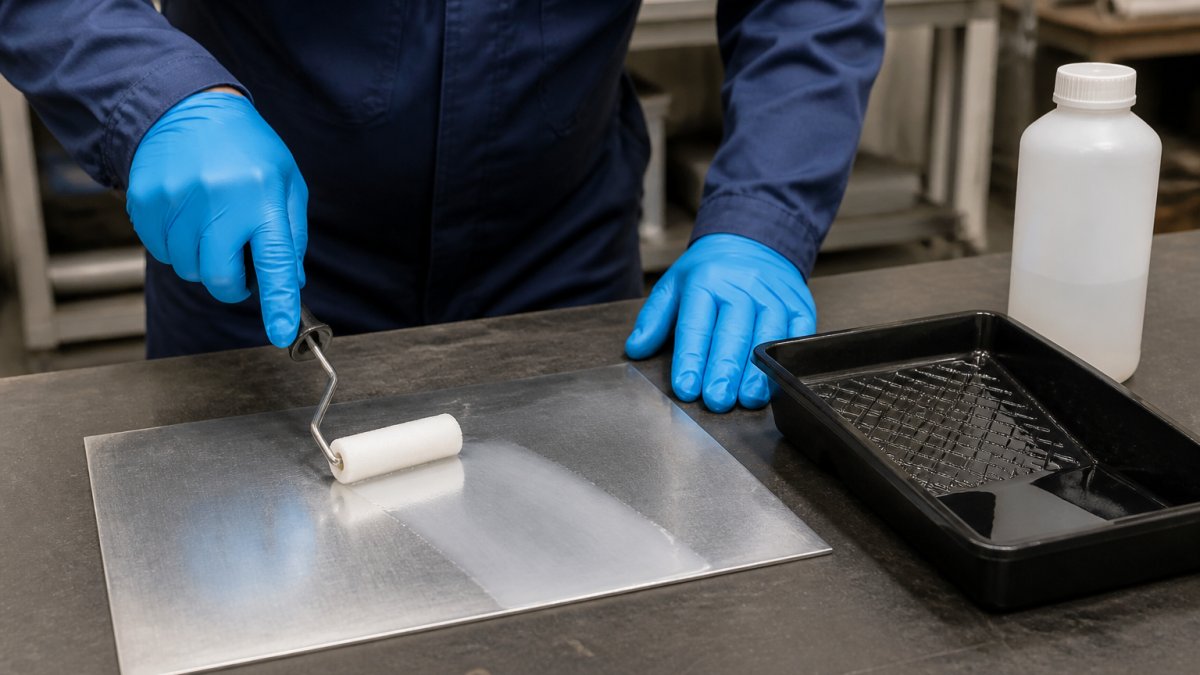
Thin, even primer application beats thick or uneven coats. Apply primer with a roller, spray system, or brush depending on substrate size and shape. Aim for a uniform, glossy finish without drips or pooling.
Let primer cure fully before printing. Most UV-compatible primers require 24 hours at room temperature. Humidity and temperature affect curing time, cold or damp conditions extend it. Don't rush this step. Printing on tacky or partially cured primer causes ink to sink into the primer rather than forming a proper bond.
Test adhesion on a small area before running a full print job. Apply a small amount of ink, let it cure fully, then perform a quick scratch test with your fingernail. If the ink doesn't budge, you're ready to proceed.
Step 3: Perform UV Ink Adhesion Test Methods
Testing adhesion before full production saves time and material waste. Standard test methods reveal whether your setup is working correctly.
Cross-hatch adhesion testing
The cross-hatch test is the industry standard for quick adhesion checks. It's simple, repeatable, and gives you immediate feedback.
Print a solid colour test patch on your prepared substrate. Let it cure fully under your UV lamp. Using a sharp utility knife or specialised cross-hatch tool, cut a grid pattern through the ink, typically 11 lines in each direction, creating 100 small squares.
Press masking tape firmly over the grid, then peel it away sharply. Examine the squares. If ink remains in all 100 squares, adhesion is excellent. If ink lifts from the grid lines or squares, adhesion is poor.
Repeat this test after each adjustment you make to curing settings or surface preparation. The cross-hatch method tracks whether your fixes are actually working.
Flex and scratch resistance checks
Cross-hatch testing works for flat, rigid substrates. For flexible materials or products that will experience physical stress, flex and scratch tests are essential.
Flex testing involves bending the printed substrate gently and observing whether ink cracks or peels. For materials that flex during use, like flexible films or bendable plastics, this test matters more than cross-hatch results.
Scratch testing simulates real-world handling. Use a fingernail or soft brush to apply moderate pressure across the printed area. Genuine adhesion problems show up immediately as ink flaking or peeling. Light surface marks are normal; actual ink loss means adhesion has failed.
These tests should be performed on every new substrate type or ink formulation you introduce to your workflow.
Step 4: Troubleshooting UV Flatbed Printer Ink Flaking
Ink flaking appears after printing and curing, usually within hours or days of production. Understanding the pattern tells you what went wrong.
Identifying ink flaking patterns and causes
Flaking that starts at edges suggests under-curing or inadequate primer. Edges cure last and cure least thoroughly, so they're the first to fail if conditions are marginal.
Flaking across the entire print indicates either severe under-curing, surface contamination, or primer incompatibility. If it's happening uniformly, the problem is systemic, not a one-off bad substrate.
Flaking in streaks or patterns often points to printhead issues. Partially blocked nozzles create thin ink coverage in those areas, and thin coverage fails adhesion first.
Document where flaking occurs. Take photos if possible. This visual information narrows down your root cause significantly.
Adjusting cure intensity and speed
If flaking appears at edges, increase lamp intensity by 10-15 percent. Run a test batch and observe results. If edge flaking stops but centre areas now show over-cure damage (discolouration or brittleness), you've gone too far, dial back by 5 percent.
If flaking is uniform across the print, suspect surface preparation first. Check primer application and curing time before adjusting lamp settings. Chasing the wrong variable wastes time and material.
Slow your print speed slightly if flaking persists. Faster printing means less time for ink to wet the substrate before curing begins. Reducing speed by 10-20 percent often improves adhesion without requiring lamp adjustments.
Keep a log of settings and results. Over time, you'll build a reliable reference for your specific equipment, inks, and substrates.
Step 5: Clean Your Printhead and Ink System
Printhead contamination creates adhesion problems that no amount of surface preparation can fix. A partially blocked nozzle fires inconsistently, leaving thin or uneven ink coverage that fails adhesion tests.
Regular cleaning prevents this. Weekly cleaning cycles keep nozzles clear and ink flowing smoothly. If you notice adhesion degrading gradually across multiple jobs, printhead contamination is likely the cause.
For serious blockages, manual cleaning becomes necessary. Soak the printhead in specialist cleaning solution for 15-30 minutes, then use controlled flushing to clear ink channels. This process is delicate, improper technique damages nozzles permanently.
At Laserprints, we offer a Printhead Cleaning Service for customers whose printheads have become partially blocked or contaminated.

If you're uncertain whether your printhead needs professional attention, a quick nozzle check test reveals the truth. Print a nozzle pattern test from your printer's diagnostic menu. Missing lines or weak output confirms blockage.
When to Call in Professional Support
Some adhesion problems resist DIY fixes. Knowing when to call for help saves frustration and expensive mistakes.
If you've worked through the diagnostic steps, adjusted settings, and tested multiple approaches without improvement, professional diagnosis makes sense.
Similarly, if you're dealing with an unfamiliar substrate or ink system, professional guidance accelerates the learning curve.
Our Call-Out Service sends a qualified engineer to your site. They diagnose the problem, test components, and repair the machine where possible during the visit.

For software or configuration issues, our Remote Support Service offers faster, cheaper help.

If your machine needs workshop repairs or deep servicing, our In-House Machine Repair Service handles DTF and UV printers.
UV printer ink adhesion issues are frustrating, but they're almost always fixable. Surface preparation, correct curing, and regular maintenance prevent most problems before they start.
At Laserprints, we specialise in keeping UV print engines running reliably for UK businesses. Shop now → Laserprints Services
Frequently Asked Questions
Why does UV ink peel off after curing?
UV ink peeling typically results from incomplete substrate preparation, insufficient primer application, or inadequate curing intensity. Contaminants like dust, oil, or moisture on the surface prevent the ink from bonding properly. If your UV lamp intensity is too low or the cure time is insufficient, the ink doesn't fully polymerise, causing poor adhesion. Verify your surface is clean, apply the correct primer for your material, and confirm your UV lamp settings match the ink manufacturer's specifications.
How do I test UV ink adhesion on different materials?
The cross-hatch adhesion test is the industry standard: use a cutting tool to score a grid pattern through the cured ink to the substrate, then apply tape and pull firmly. If ink remains intact, adhesion is good. For flex materials, bend the printed area to check for cracking. On glass and metal, test scratch resistance by applying moderate pressure with a fingernail or soft brush. Always test on scrap material first before running production batches to confirm surface preparation and primer choice are correct.
What role does surface energy play in UV ink adhesion?
Surface energy determines how readily ink spreads and bonds to a substrate. Low-energy surfaces like plastics and some metals repel ink, causing poor wetting and adhesion. High-energy surfaces like glass accept ink more readily. Primers increase surface energy, enabling better ink contact and bonding. If you're printing on low-energy materials, selecting the correct primer for that substrate type is essential. This is why best primers for UV printing on glass and metal are specifically formulated to bridge the energy gap between the ink and the substrate.
How quickly can Laserprints get a technician to us if our UV printer fails?
Our Call-Out Service (£125.00) brings a qualified engineer to your site to diagnose and repair faults. Turnaround depends on your location and workload, but we prioritise rapid response to minimise your downtime. If on-site repair isn't possible, we'll explain what's needed and recommend next steps, which may include our In-House Machine Repair Service (£100.00) with typical turnaround of 2-3 working days. For software issues, Remote Support Service (£24.99) can often resolve problems the same day without an engineer visit.