

Table of Contents
- Why UV Printer Printhead Failure Costs More Than You Think
- Common Causes of UV Printhead Failure and How to Stop Them
- Establish a UV Printer Maintenance Schedule That Works
- Recognise the Signs of UV Printhead Clogging Before It's Too Late
- Step-by-Step Preventative Maintenance for UV Printers
- Understanding the Cost of Industrial Printhead Replacement
- Troubleshooting Early Warning Signs
- Frequently Asked Questions
Last Updated: September 30, 2026
Why UV Printer Printhead Failure Costs More Than You Think
A broken printhead isn't just a repair bill. It's lost production time, missed deadlines, and angry customers. Most businesses don't realise how fast these costs add up.
When a printhead fails, your entire machine stops. Every hour it sits idle costs money. You're losing revenue while paying technicians to diagnose the problem. Then comes the part that really hurts: replacement parts and labour fees.
The real cost? It's not the printhead itself. It's the operational disruption. The good news is this is entirely preventable. The good news is this is entirely preventable.
Most printhead failures don't happen overnight. They develop slowly. Ink dries. Nozzles clog. Performance drops. If you catch these signs early, you can prevent UV printer printhead failure before it happens. That's what this guide covers: how to prevent UV printer printhead failure before it becomes a crisis.
Common Causes of UV Printhead Failure and How to Stop Them
Understanding what kills printheads helps you avoid it. Most failures trace back to a few preventable issues.
Ink contamination is the leading cause. Dust, debris, or moisture gets into the ink system. When this reaches the printhead, it clogs nozzles. The printer tries to force ink through blocked channels. Nozzles fail. Performance collapses.
Air in the ink lines causes similar damage. When air bubbles reach the printhead, they disrupt ink flow. Nozzles fire unevenly. Some don't fire at all. This looks like missing lines in your prints.
Dried ink happens when printheads sit unused. UV ink dries quickly without proper sealing. Once it hardens inside the nozzles, it's almost impossible to clear. This is why parking position and cap seals matter so much.

Inconsistent ink supply stresses the printhead. If dampers fail or filters clog, ink pressure becomes unstable. The printhead works harder. Components wear faster. Eventually, something breaks.
Temperature fluctuations damage sensitive components. UV printers need stable environments. When temperatures swing, ink viscosity changes. Seals expand and contract. Connections loosen.
The solution to all of these is simple: control your environment and maintain your equipment regularly. Remove contaminants before they reach the printhead. Keep ink flowing smoothly. Protect seals and connections. Do this consistently, and most failures never happen.
Establish a UV Printer Maintenance Schedule That Works
A maintenance schedule keeps you organised and prevents you from skipping critical steps.
Start with a realistic plan. Don't create a schedule so complex you'll abandon it after two weeks. Build something your team can actually follow every single day.
Your schedule should have four levels:
- Daily tasks take 15 minutes
- Weekly tasks take 30-45 minutes
- Monthly tasks take 1-2 hours
- Quarterly tasks require professional support
Daily work prevents most problems. Weekly cleaning catches issues before they spread. Monthly maintenance addresses wear and tear. Quarterly professional service handles deep cleaning and component replacement.
Post your schedule where technicians see it. Use a checklist system. Check items off as they're completed. This creates accountability and a record of maintenance history.
When problems do occur, your maintenance log proves you've been caring for the equipment. This matters for warranty claims and insurance.
Recognise the Signs of UV Printhead Clogging Before It's Too Late
Early warning signs appear weeks before total failure. Catching these saves you thousands.
Missing nozzles are the first red flag. Look at test prints. Do you see thin lines or gaps in the output? This means some nozzles aren't firing. Partial clogging is starting.
Colour shifts indicate inconsistent ink flow. If cyan looks darker than usual or magenta appears weak, ink isn't reaching all nozzles equally. This is a clogging warning.
Reduced print quality across the board suggests damper problems. Prints become softer. Colours lack vibrancy. Lines look fuzzy instead of sharp.
Slow printing speed can mean the printer is compensating for clogged nozzles. It runs more cleaning cycles automatically. This slows production and wastes ink.
Unusual sounds during cleaning cycles suggest the suction system is working harder than normal. This happens when blockages resist the cleaning process.
Ink leaks around seals indicate seal failure. This is a critical warning. Leaks allow air into the system and contamination into ink lines.
If you see any of these signs, stop printing immediately. Run a full cleaning cycle. If problems persist after cleaning, contact a specialist. Waiting makes the damage worse. At Laserprints, we offer professional printhead cleaning services that can recover most blocked nozzles before replacement becomes necessary.
Step-by-Step Preventative Maintenance for UV Printers
This is where prevention happens. Follow these steps exactly.
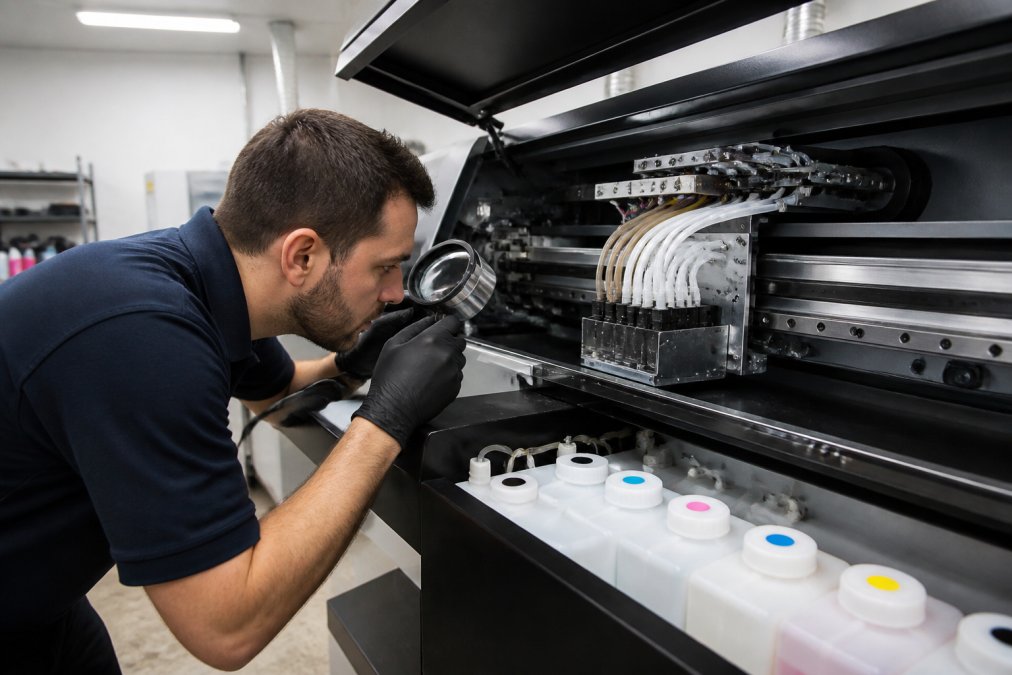
1. Daily Inspection and Ink System Checks
Every morning before printing, spend 10 minutes on inspection.
Check your ink levels first. Low ink creates air pockets in lines. Top up reservoirs if they're below the halfway mark. Use only approved UV inks for your specific printhead model.
Inspect the printhead visually. Look for dried ink around nozzles or cap seals. If you see crusty deposits, this is early clogging. Address it immediately with a cleaning cycle.
Check the parking position. Your printhead must be fully seated in the cap when not in use. Misalignment allows ink to dry. Push the carriage home gently and confirm it locks.
Listen for unusual sounds when the machine powers on. Normal startup is quiet. Grinding or whirring suggests mechanical problems. Stop and investigate before printing.
Run a nozzle check print. Most printers have this function built in. Print a test pattern and look for gaps. If nozzles are missing, run an automatic cleaning cycle before production.
2. Weekly Printhead Cleaning Cycles
Once per week, run a full cleaning cycle even if prints look perfect.
Access your printer's maintenance menu. Select the deep cleaning option. Let the machine run the complete cycle without interruption. This typically takes 20-30 minutes.
During cleaning, the printer draws ink through the nozzles under suction. This clears minor blockages before they become serious. It also refreshes ink in the lines.
After cleaning, print another test pattern. All nozzles should fire evenly. If any are still missing, run a second cleaning cycle.
3. Monthly Damper and Seal Replacement
Dampers filter ink and regulate pressure. They wear out. Replace them monthly as preventative maintenance.
Order replacement dampers that match your printhead model. For Epson I3200 and XP600 systems, the I3200 XP600 UV Ink Damper costs £12.49 and comes as a set of four. Having spares on hand prevents downtime when replacement is needed.
Cap seals also deteriorate. These rubber components create the seal that prevents ink drying when the printhead is parked. Replace them monthly. The I3200 Printhead Cap Top Seal fits portrait-style I3200 configurations and costs £14.99.
When replacing these components, document the date and part numbers in your maintenance log. This tracking helps you spot patterns if failures accelerate.
4. Quarterly Professional Cleaning Service
Every three months, send your printhead to specialists for deep cleaning.
Professional cleaning is different from automatic cycles. Technicians use chemical treatments and controlled flushing to remove stubborn blockages that machines can't clear alone.
Laserprints offers Printhead Cleaning Service at £49.99. Your printhead is assessed, cleaned using specialist techniques, tested, and returned within approximately five working days. The service includes controlled chemical cleaning, directional flushing of ink channels, nozzle plate cleaning, and flow testing.
This isn't a guaranteed repair if permanent damage exists. But for partial blockages and contamination, professional cleaning recovers most nozzles and extends printhead life significantly.
Customers are responsible for securely packaging and sending the printhead to our workshop, with the service typically completed within approximately five working days, subject to the condition of the printhead and workshop workload.
Understanding the Cost of Industrial Printhead Replacement
Knowing replacement costs motivates preventative action.
But the financial impact goes deeper. While your printhead is being replaced, your machine is offline. You're not printing. You're not generating revenue. Every day of downtime costs money in lost production and missed deadlines.
Preventative maintenance costs far less. Monthly damper and seal replacement costs £12.49 for a set of four I3200 XP600 UV Ink Dampers and £14.99 for an I3200 Printhead Cap Top Seal - Portrait Fitting.
Troubleshooting Early Warning Signs
When problems emerge, act fast. Early intervention stops small issues becoming catastrophes.
Frequently Asked Questions
What are the most common causes of UV printhead failure?
UV printhead failure typically results from ink contamination, blocked nozzles, dried ink buildup, air entering the ink system, or damaged seals on the cap top. Environmental factors such as dust, humidity fluctuations, and temperature changes also contribute significantly. Inconsistent maintenance schedules and using incompatible or low-quality inks accelerate failure. Regular cleaning, proper storage conditions, and scheduled maintenance prevent most of these issues from developing into costly printhead damage.
How often should I perform maintenance on my UV printer to prevent printhead failure?
Daily inspections of ink levels and nozzle performance are essential. Weekly automated cleaning cycles keep nozzles clear and ink flowing smoothly. Monthly replacement of worn dampers and seals prevents air infiltration and contamination. Quarterly professional cleaning services, such as Laserprints' Printhead Cleaning Service (£49.99), recover nozzle performance and extend printhead life. This structured UV printer maintenance schedule catches problems early and prevents catastrophic failure.
What are the warning signs of UV printhead clogging I should watch for?
Early signs of UV printhead clogging include missing nozzles in print output, uneven colour distribution, reduced print quality, and slower printing speeds. You may also notice ink not flowing consistently or the printer requiring more frequent cleaning cycles than usual. These signs of UV printhead clogging indicate partial blockages that can worsen rapidly if ignored. Addressing them immediately through manual cleaning or professional service prevents complete nozzle failure and extends printhead life significantly.
Is professional printhead cleaning worth the cost compared to replacement?
Yes. Laserprints' professional Printhead Cleaning Service costs £49.99 and can recover nozzle performance in approximately five working days. Even if you require cleaning quarterly, annual preventative costs remain a fraction of replacement. Professional cleaning helps extend printhead life, making it a cost-effective maintenance investment.