

Table of Contents
- What You'll Need Before You Start
- Step 1: Diagnose the Clog and Confirm It's Not a Damaged Printhead
- Step 2: Run a Safe Printhead Cleaning Cycle
- Step 3: Manual Cleaning for Stubborn Printhead Clogs
- Signs of a Damaged UV Printhead (When Cleaning Won't Help)
- Your UV Printer Maintenance Schedule to Prevent Clogs
- When to Call Professional UV Printer Repair Services
- Common Mistakes to Avoid When Clearing Printhead Clogs
- Frequently Asked Questions
Last Updated: September 14, 2026
What You'll Need Before You Start
A blocked nozzle rarely announces itself politely. It shows up as banding on a job that was fine yesterday, a missing colour on a proof, or a white line running through a full-colour panel at 4pm on a Friday. Knowing how to clean UV printer printhead clogs properly starts long before you touch the carriage, and at Laserprints we see the same pattern repeatedly: operators who rush the diagnosis end up replacing a head that only needed a flush.
UV ink is the complicating factor. Unlike water-based inks, UV-curable ink sets hard when exposed to UV light, which means any ink sitting on the nozzle plate or wicking into the capping station will cure into a solid plug (Printing industry). That plug does not dissolve with a gentle wipe.
Gather these before you begin:
- Nitrile gloves and safety glasses
- Lint-free swabs or cleaning wands
- Manufacturer-approved UV printhead cleaning solution
- A clean, lint-free cloth
- Distilled water for a final flush where the manufacturer allows it
- The printer's own maintenance or nozzle-check routine
Step 1: Diagnose the Clog and Confirm It's Not a Damaged Printhead
Start by printing a nozzle check pattern and reading it carefully. A genuine clog shows as a consistent, repeatable gap in the same position across multiple prints. Intermittent gaps that move between prints usually point to an ink supply, pressure or capping issue rather than a blocked nozzle.

Run the check three times. If the gap stays identical, you are dealing with a clog. If it shifts, look at the ink line, the sub-tank level and the capping station seal first.
Check the printhead surface under good light. A thin film of cured ink around the nozzle rows is normal wear. Physical damage looks different: scratches, dents, or a swollen, delaminated nozzle plate.
Printhead clogs are a flow problem. Damage is a hardware problem. Treating one as the other wastes time and money.
Step 2: Run a Safe Printhead Cleaning Cycle
The built-in cleaning cycle is your first real move, and it works more often than operators expect. Most UV printers offer a standard clean and a power clean; start with the standard cycle every time.
Run one standard clean, then print a nozzle check. Repeat up to three times. If the pattern improves but does not clear, you are making progress and should continue. If nothing changes after three cycles, stop and move to manual cleaning.
The mistake here is running six or seven power cleans in a row. Each cycle purges ink and pulls on the head. Excessive cleaning wastes ink, floods the capping station and can push debris further into the nozzle row instead of out of it.
Step 3: Manual Cleaning for Stubborn Printhead Clogs
Manual cleaning is where most damage happens, so slow down. Move the carriage to the maintenance position, power down if your machine requires it, and work with the printhead surface at eye level.
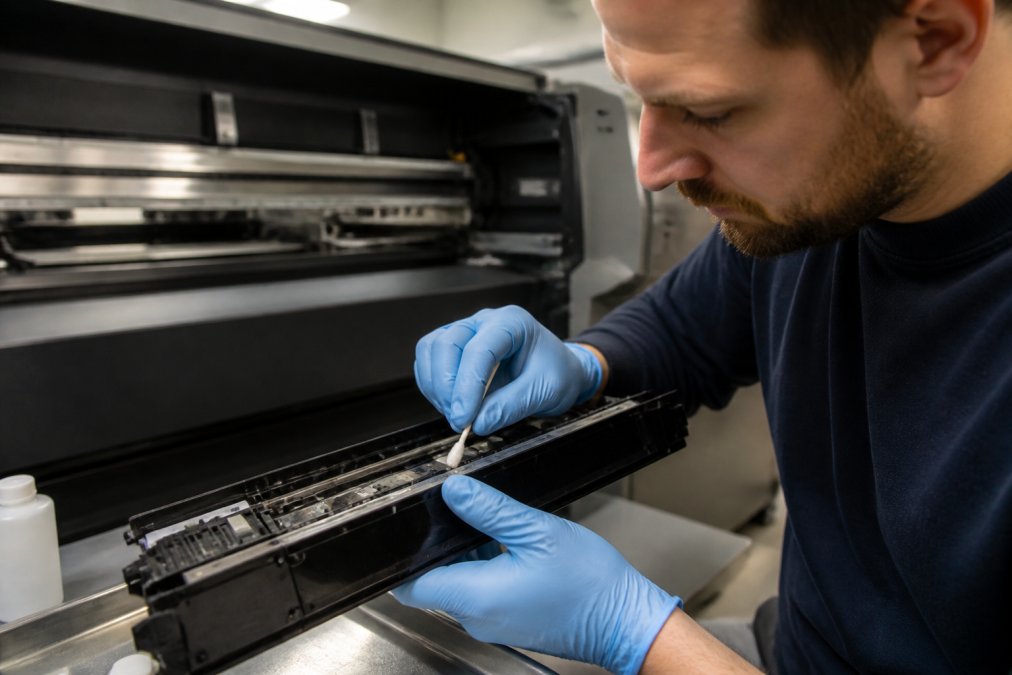
Dampen, do not soak, a lint-free swab with approved cleaning solution. Wipe gently along the nozzle row in one direction, then use a fresh swab for the next pass. Never scrub back and forth, and never let solvent pool on the nozzle plate.
For a stubborn clog, apply solution to the capping station and let the head sit capped for ten to fifteen minutes. This softens cured ink without mechanical force. Then run a standard clean and recheck.
If two or three gentle attempts do not clear it, stop. A printhead that has been manually cleaned repeatedly without improvement is a candidate for professional attention, not more swabs.
Signs of a Damaged UV Printhead (When Cleaning Won't Help)
Cleaning will not fix a physically damaged head, and continuing to try makes things worse. Watch for these signals:
- A gap that never moves, no matter how many cleans you run
- Visible scratches, dents or delamination on the nozzle plate
- Ink pooling on the head surface immediately after a clean
- Error codes relating to head voltage, temperature or drive
- A sudden loss of an entire colour channel with no improvement after capping
Any of these point to hardware failure. At that stage, send the printhead to a workshop that can assess it properly rather than ordering a replacement blind. A Printhead Cleaning Service gives you a proper assessment and specialist cleaning before you commit to a new head, which is almost always the cheaper first step.
Your UV Printer Maintenance Schedule to Prevent Clogs
Prevention beats recovery every time, and a UV printer maintenance schedule is the single most effective tool you have. Most clog-related downtime traces back to inconsistent daily habits rather than genuine equipment faults.
| Frequency | Task | Why It Matters |
|---|---|---|
| Daily | Nozzle check and wipe capping station | Catches partial clogs before they cure |
| Daily | Confirm head is capped when idle | Uncapped UV ink cures within hours |
| Weekly | Clean capping station and wiper blade | Prevents ink build-up and poor seals |
| Weekly | Check ink levels and lines for air | Air in the line mimics a clog |
| Monthly | Inspect tubing, filters and seals | Catches wear before it causes a blockage |
| Quarterly | Full service and nozzle assessment | Spots slow degradation early |
If the machine sits idle for more than a few days, run a nozzle check on return before starting production. Idle time is the most common cause of the stubborn clogs we see.
When to Call Professional UV Printer Repair Services
Bring in professional UV printer repair services when cleaning has stalled, when a head shows physical damage, or when the same nozzle keeps blocking within days of a clean. Repeated clogs in one position usually mean an underlying supply, capping or pressure fault that no amount of swabbing will resolve.
Laserprints handles this work across laser, DTF and UV print engines, so a single call covers all your equipment rather than three separate contractors. For software and configuration faults, a Remote Support Service lets an engineer diagnose the issue over a secure connection without waiting for a site visit. When the fault needs hands on the machine, a Call-Out Service sends a qualified engineer to your premises to diagnose and, where possible, repair on the first visit.


Common Mistakes to Avoid When Clearing Printhead Clogs
The same errors cause most avoidable printhead failures we are called out to. Avoid these and you will clear more clogs at the first attempt.
- Scrubbing the nozzle plate. Mechanical force damages the coating and turns a clog into a permanent fault.
- Running endless power cleans. This wastes ink, floods the capping station and can drive debris deeper.
- Using the wrong solvent. Unapproved chemicals attack the nozzle plate. Check the manufacturer's list every time.
- Ignoring idle time. A machine left uncapped over a weekend will cure ink in the nozzles.
- Replacing a head before assessment. Many "dead" heads recover with professional cleaning. Get an assessment first.
- Skipping the maintenance log. Without records, you cannot spot a recurring fault before it becomes downtime.
If your team would rather hand the problem to specialists, an In-House Machine Repair Service lets you book a repair, deliver the machine to the workshop, and have a qualified engineer carry out a full inspection and service.
Frequently Asked Questions
Can you use isopropyl alcohol to clean UV printheads?
Isopropyl alcohol is widely used for manual cleaning, but it must be the correct concentration and applied with lint-free swabs, not cloths that shed fibres. Some UV printhead manufacturers specify their own cleaning fluid because certain inks react badly with alcohol. Always check your printer's manual first. If you're unsure, use the manufacturer's recommended solution or ask a specialist before touching the nozzle plate.
What causes UV printer printhead clogs?
The most common causes are infrequent printing, ink left sitting in the nozzles during downtime, exposure to UV light near the head, and dust or debris on the capping station. UV inks cure when exposed to light, so even a short period of improper capping can start a clog. Keeping to a regular UV printer maintenance schedule and capping the head correctly after every job prevents most clogs.
How often should I perform preventative maintenance on UV printheads?
Daily maintenance should include a nozzle check and a wipe of the capping station. Weekly tasks include a deeper clean and inspection of the wiper blade. Monthly, run a full flush if the printer has had light use. If your machine runs high-volume production, shorten these intervals. A documented UV printer maintenance schedule is the single most effective way to avoid emergency printhead clogs.
What are the signs of a permanent UV printhead failure?
Persistent missing nozzles after multiple cleaning cycles, physical damage to the nozzle plate, ink leaking from the head, or error codes that return immediately after reset all point to permanent failure. If you've followed every cleaning step and the nozzle check still shows gaps, the head likely needs replacement. Professional UV printer repair services can confirm the diagnosis before you spend money on a new printhead.
Persistent printhead clogs cost production hours you cannot recover, and the difference between a quick fix and a dead head usually comes down to how the first hour is handled. Laserprints supports print businesses with expert repair and servicing, genuine spare parts, remote diagnostics and rapid call-outs across laser, DTF and UV print engines, so a single partner keeps your equipment running. Get started with Laserprints and keep your production schedule uninterrupted.