

Table of Contents
- What Happens When CO2 Laser Optics Are Dirty
- Signs of Damaged Laser Optics You Cannot Ignore
- How Output Power Drops with Contaminated Optics
- CO2 Laser Lens Cleaning Procedure: The Right Way
- Laser Machine Maintenance Schedule to Keep Optics Clean
- Common Mistakes That Damage Optics During Cleaning
- When to Call a Professional Instead of Cleaning Yourself
- Frequently Asked Questions
Last Updated: September 28, 2026
What Happens When CO2 Laser Optics Are Dirty
Dirty CO2 laser optics are one of the fastest ways to cripple your production schedule. When contamination builds up on the mirrors and lenses inside your laser system, light scatters instead of focusing. The beam spreads across a wider area, and the energy density at the work surface drops dramatically. What should be a clean, precise cut or engraving becomes a ragged, weak mark that either fails quality control or requires multiple passes to achieve the desired result.
The contamination usually comes from three sources: dust and airborne particles from the cutting process itself, oxidation of the mirror coatings over time, and residue from materials being cut or engraved. Each type of contamination behaves differently. Dust sits on the surface and scatters light. Oxidation degrades the reflective coating itself. Material residue, especially from acrylic or wood burning, can actually bond to the optics if left long enough, making it far harder to remove without causing damage.
The power drop happens gradually, so operators often don't notice until the machine is performing at a fraction of its normal capability.
A dirty optical system forces the laser to work harder, pushing it closer to thermal limits and accelerating wear on components like the laser tube.
Signs of Damaged Laser Optics You Cannot Ignore
The earliest warning sign is inconsistent cut or engraving depth across the same material. Dust and contamination scatter light unevenly, creating stronger and weaker areas in the beam.
Watch for visible marks on the mirrors or lenses by holding a bright torch at an angle. Streaks, spots, or cloudy patches directly reduce light reaching your work and impact power density.
If the laser runs at higher power settings to achieve previous results, that's a clear signal of contamination. Many operators notice this before seeing visible marks.
A healthy CO2 laser produces a circular or slightly elliptical beam. Distortion, ring patterns, or holes in the centre indicate contamination blocking the light path.
If you cannot achieve a sharp focus point at the expected distance, contaminated optics are the likely culprit, affecting cutting precision and engraving quality.
How Output Power Drops with Contaminated Optics
The relationship between cleanliness and output power is exponential. Small dust amounts reduce power by 5-10 percent, but visible residue typically means 30-50 percent power loss.
Each optical surface reflects a percentage of light to the next component. Clean mirrors reflect 95 percent; contamination reduces this to 85 percent. With four mirrors, clean optics yield 0.95⁴ = 0.81 (19 percent loss), while contaminated optics yield 0.85⁴ = 0.52 (48 percent loss).
Jobs that once took 10 minutes now take 15-20 minutes, reducing throughput and revenue while increasing electricity consumption and wear on the laser tube.
Contaminated optics scatter the beam over a larger area instead of concentrating it at a focal point, reducing cutting force and precision and forcing multiple passes.
CO2 Laser Lens Cleaning Procedure: The Right Way
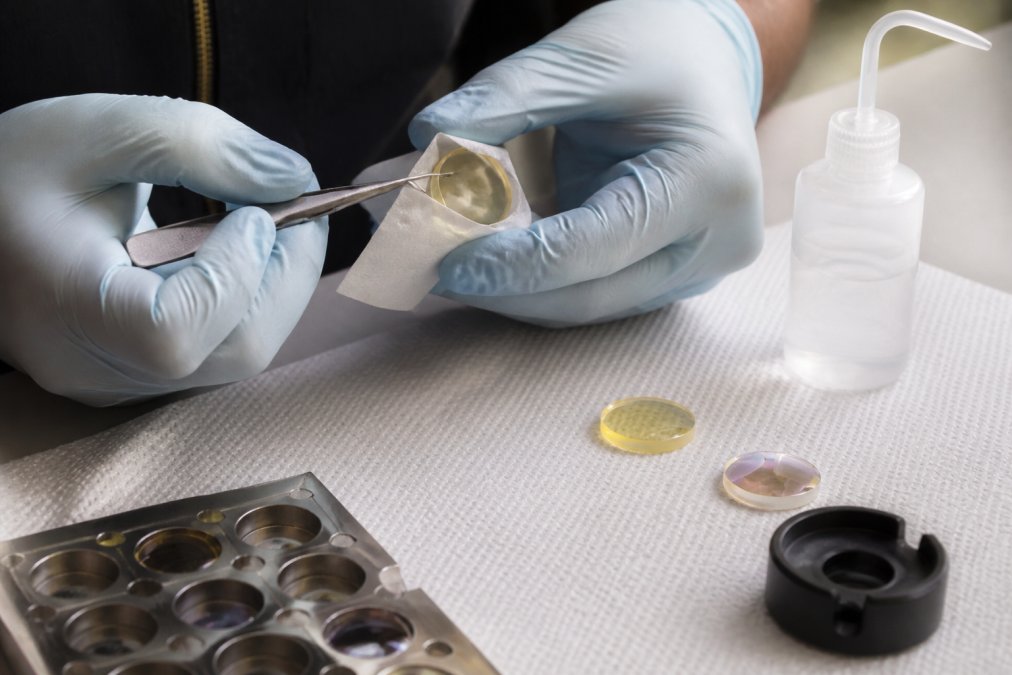
Use only optical-grade lens paper and optical cleaning solution. Paper towels scratch coatings; household cleaners leave residue that scatters light.
Power down and cool the machine completely. Remove optics one at a time and place on a clean surface. Handle only by the edges; skin oils contaminate surfaces.
Apply cleaning solution to fresh lens paper and wipe in circular motions from centre outward using light pressure. For heavy contamination, use fresh paper for each wipe.
Inspect under bright light after each wipe. Repeat with fresh paper if residue remains; partial cleaning can perform worse than leaving it dirty.
Air dry completely before reinstalling. Reinstall in reverse order so the first-cleaned optic (dried longest) goes back in first.
Tools and Materials You'll Need
You need very little to clean optics properly, but what you use must be correct:
- Optical-grade lens paper (not regular paper towels or tissues)
- Optical cleaning solution designed for infrared optics (not general glass cleaner)
- Precision tweezers for handling optics safely
- A clean, lint-free workspace
- Bright light source for inspecting optics
- A small container to hold optics during cleaning (something that won't scratch them)
- A ground strap or anti-static mat (static discharge can damage some optical coatings)
Do not substitute materials; wrong solutions or paper damage coatings. Proper materials cost far less than replacing damaged optics.
Step-by-Step Cleaning Process
Step 1: Power down and cool the machine. Switch off the laser and allow at least 15 to 20 minutes for the system to cool completely. This is non-negotiable. Working on warm optics risks thermal shock if you apply cool cleaning solution to a hot surface.
Step 2: Access the optical path. Consult your machine's manual to identify the location of each optical element. Most CO2 lasers have mirrors mounted in the beam path and a lens at the cutting head. Remove or open access panels as needed. Take a photo of the setup before you start so you remember how everything goes back together.
Step 3: Remove the first optic carefully. Use the tweezers to lift the optic by its edges only. Never touch the reflective or transmissive surface. Place it on a clean surface with the working surface facing up.
Step 4: Apply cleaning solution and wipe. Put a small amount of solution on fresh lens paper and wipe in a circular motion from centre to edge. Use light, steady pressure. Do not scrub or apply heavy force.
Step 5: Inspect and repeat if necessary. Hold the optic up to bright light and look for streaks, spots, or residue. If you see contamination, use a fresh piece of lens paper and repeat the wipe. Continue until the surface is clean.
Step 6: Air dry completely. Set the cleaned optic aside and let it dry for at least 10 minutes before reinstalling. Do not use compressed air to dry it, compressed air often contains moisture and particles.
Step 7: Reinstall in reverse order. Put the optics back in the machine in the reverse order you removed them. Make sure each optic is seated properly in its mount.
Step 8: Test the system. Run a test cut or engraving on scrap material before returning to production. Check that the beam is sharp, the cut is clean, and the power output feels normal.
Laser Machine Maintenance Schedule to Keep Optics Clean
The best approach to dirty CO2 laser optics is preventing them from getting dirty in the first place. A consistent maintenance schedule reduces downtime and extends the life of your optical components.
Inspect optics visually every week if your machine runs daily. Use a bright torch at an angle to the mirrors and check for dust, residue, or cloudiness. This takes five minutes and catches problems early. If you see visible contamination, clean the optics immediately rather than waiting for power loss to become obvious.
Clean the optics thoroughly every month for machines in regular use. Even if they don't look dirty, contamination accumulates gradually. Monthly cleaning keeps the system operating at peak performance and prevents the exponential power loss that happens when contamination builds up over longer periods.
Check the air assist system and exhaust ventilation monthly as well. A blocked air assist nozzle or poor exhaust means more material residue and dust get blown back toward the optics. Keeping these systems clear reduces the contamination load on your optics.
Replace the air filter in your laser's cooling system every three months, or more frequently if your environment is dusty. A clogged filter means the cooling system draws air from inside the machine, which increases dust circulation around the optics.
For machines that cut or engrave heavily every day, consider professional servicing every six months.
Common Mistakes That Damage Optics During Cleaning
The most common mistake is using the wrong materials. Paper towels, tissues, and general glass cleaner will damage the optical coatings. Once the coating is scratched or chemically damaged, the optic is compromised permanently. Do not try to save money here, use proper optical-grade materials.
When to Call a Professional Instead of Cleaning Yourself
If the optics are visibly scratched or pitted, do not attempt to clean them yourself. A damaged coating cannot be restored by cleaning. Professional replacement is the only solution, and trying to clean a damaged optic will only make it worse. Contact a specialist like Laserprints to source and install replacement optics correctly.
Frequently Asked Questions
How do I know if my CO2 laser lens is dirty?
Visible signs include dust, residue, or discolouration on the lens surface when you inspect it under bright light. Operationally, dirty CO2 laser optics cause reduced cutting or engraving depth, inconsistent beam quality, and increased power consumption as the laser works harder to compensate. If your machine previously cut through 3 mm acrylic cleanly but now struggles at the same settings, contaminated optics are likely the cause. Check your lens regularly, monthly inspections catch buildup before it affects output.
What is the best way to clean CO2 laser optics without damaging them?
Use only optical-grade lens paper and isopropyl alcohol (99% purity minimum). Never touch the lens surface with bare fingers. Gently wipe in a circular motion from the centre outward, using a fresh piece of lens paper for each pass. For the CO2 laser lens cleaning procedure, ensure the machine is powered off and cooled completely before opening the optical path. If you see stubborn deposits or the lens shows signs of permanent damage like pitting or coating loss, stop and contact a professional.
How often should I clean my laser machine optics?
Most production environments benefit from a laser machine maintenance schedule that includes optical inspection and cleaning every 2-4 weeks, depending on usage intensity and ambient dust levels. High-volume cutting or engraving operations with significant material residue may require weekly checks. If your facility has poor air filtration or operates in a dusty environment, increase frequency to weekly. Establish a maintenance log to track cleaning dates and any performance changes, this data helps identify whether optics are degrading faster than normal, signalling a deeper issue.
Can dirty laser mirrors cause a fire?
Dirty mirrors do not directly cause fire, but they create operational risks. Contaminated optics cause the laser to work at higher power settings to achieve the same cutting depth, which can generate excessive heat in the material being processed. This increases the risk of scorching, charring, or ignition, especially with flammable materials like fabric or thin wood. Additionally, dust and residue on mirrors can reflect heat unpredictably, potentially damaging the optical housing or nearby components. Regular cleaning eliminates this risk and keeps the laser operating at safe, efficient power levels.