

Table of Contents
- Why Laser Engraver Accuracy Matters for Production
- Master Laser Engraver Calibration for Consistent Results
- Perfect Your Laser Engraver Focus Adjustment
- Correct Laser Engraving Alignment Issues
- Perform Regular Laser Engraving Accuracy Tests
- Maintain Optical Cleanliness and Component Precision
- Control Material Movement and Secure Workpieces
- Optimise Laser Settings for Your Materials
- Frequently Asked Questions
Last Updated: October 6, 2026
Why Laser Engraver Accuracy Matters for Production
Precision is everything in laser engraving. When your machine drifts even slightly off target, you lose money fast. Misaligned cuts waste material. Blurry edges require rework. Downtime stacks up.
Accuracy problems can cascade through production schedules. A machine running off specification doesn't just produce inferior output, it can force you to scrap batches, delay orders, and frustrate customers. The cost compounds quickly.
The good news: most accuracy issues are preventable. They stem from drift in calibration, focus, or alignment. Catch them early through regular testing and maintenance, and you keep your laser engraver performing at peak capacity.
This guide covers the seven core techniques that separate reliable engraving from costly mistakes. Each one addresses a specific source of error. Together, they form a maintenance routine that keeps your equipment producing consistent, professional results.
Master Laser Engraver Calibration for Consistent Results
Calibration is the foundation of laser engraver accuracy. Without it, everything else fails.
Your machine's calibration maps the relationship between software coordinates and physical movement. Over time, thermal expansion, vibration, and mechanical wear shift this map. The laser head drifts. Cuts land in the wrong place.
Start with a calibration test. Mark a known distance on your material, typically 100mm or 200mm. Run your engraver over it. Measure the actual output. If the engraved distance doesn't match your input, you have drift.
The fix depends on your machine type. Most systems have calibration adjustment menus in their software. Some require mechanical tweaks to stepper motors or belts. Check your manual for the specific procedure.
Recalibrate every three to six months for heavy-use equipment. More frequently if you notice drift creeping in. Light-use machines may need it annually.
Many operators skip this step because it takes time. That's a false economy. Thirty minutes of calibration prevents weeks of scrap material and customer complaints.
Perfect Your Laser Engraver Focus Adjustment
Focus is where the laser beam concentrates its energy. Get it wrong, and your engraving becomes fuzzy, weak, or inconsistent across the material surface.
Most machines allow manual or automatic focus adjustment. Automatic systems use sensors to measure material height and adjust the laser head position. Manual systems require you to physically move the head until the beam focuses sharply.
The focused beam should create the smallest, brightest spot on your material. You can test this by running a test burn at different heights. Look for the point where the mark is darkest and sharpest. That's your focus point.
For materials with uneven surfaces, leather, wood, fabric, focus becomes trickier. The laser head may be perfectly positioned for one edge but out of focus at the centre. Some machines offer dynamic focus, which adjusts height during the cut. If yours has this feature, use it.
Check focus before every production run. A quick test on scrap material takes seconds and prevents hours of waste.
Correct Laser Engraving Alignment Issues
Alignment problems cause your design to land in the wrong place on the material. The engraver may cut too far left, too high, or rotated slightly off-axis.
Most alignment issues come from two sources: the material isn't positioned where the software thinks it is, or the machine's coordinate system has drifted.
Test alignment by running a simple shape, a small square or circle, at a known position on your material. Measure where it actually appears. If it's offset, note the direction and distance.
Software-level fixes come first. Most machines let you adjust the origin point (where X=0, Y=0). Reposition this to match your actual material placement. Some systems allow you to input a known offset value, which the software applies automatically to all jobs.
If software adjustments don't fix the problem, check your mechanical setup. Are your material guides loose? Is the cutting bed level? Are the belts driving the laser head properly tensioned? Any of these can introduce alignment drift.
Run a test job after any adjustment. Measure the output carefully. Small errors compound across large batches.
Perform Regular Laser Engraving Accuracy Tests
Testing reveals problems before they become expensive.
Set up a standardised test pattern. This might include:
- A grid of small squares at known spacing
- Text in your standard font and size
- Lines at different angles
- A scale ruler for direct measurement
Run this test monthly on scrap material. Compare the output to your baseline. Look for:
- Spacing drift between elements
- Blurred or inconsistent line quality
- Misalignment across the cutting bed
- Inconsistent darkness or burn depth
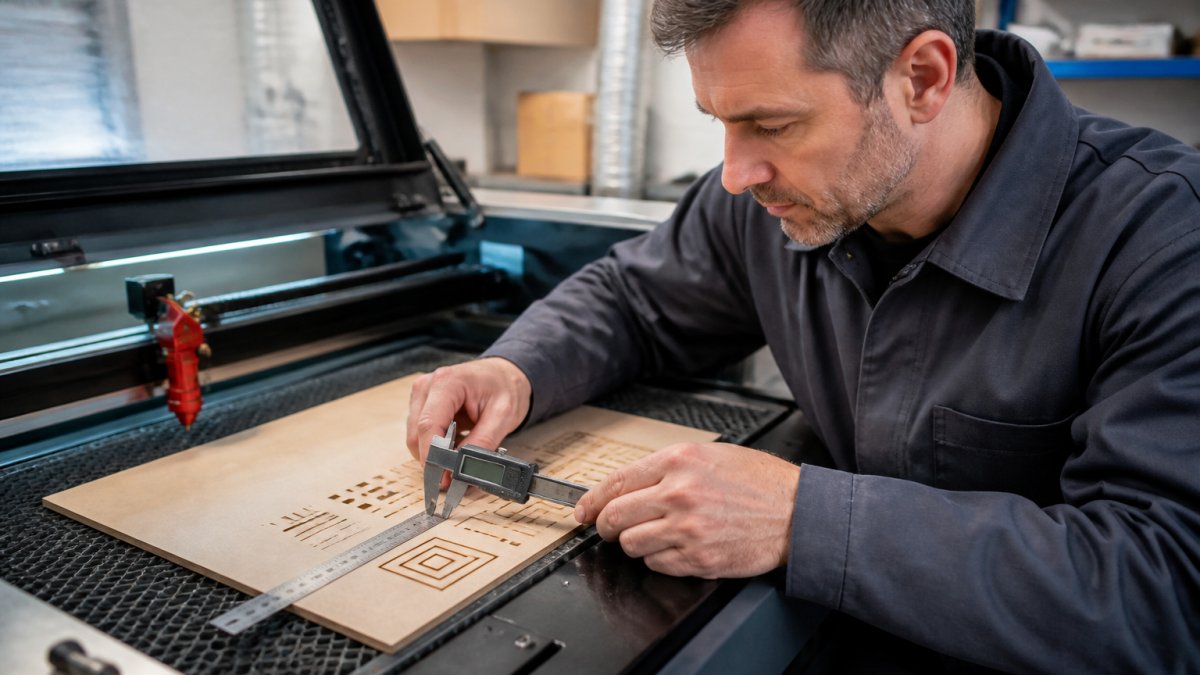
Document your results. Keep a log of test dates, measurements, and any adjustments you made. Over time, this log reveals trends. If accuracy drifts gradually over weeks, you know maintenance is due. If it shifts suddenly, something mechanical may have failed.
Many operators skip testing because it feels like wasted production time. In reality, thirty minutes of testing saves you days of scrap and rework.
Maintain Optical Cleanliness and Component Precision
Dirty optics scatter the laser beam. Misaligned mirrors and lenses bend it off-target. Both destroy accuracy.
Your laser engraver uses mirrors and lenses to direct and focus the beam. These components are precision-engineered and extremely sensitive to contamination. Dust, smoke residue, and fingerprints all degrade beam quality.
Clean your optics regularly. Use lens paper and isopropyl alcohol. Never touch optics with bare fingers. Never use paper towels or cloth, these scratch the surface.
Check mirror alignment visually. The beam should hit each mirror dead-centre. If it's creeping toward an edge, the mirror has shifted. Adjustment typically requires loosening mounting screws and repositioning the mirror slightly. This is fiddly work; if you're unsure, call in a specialist.
Similarly, check that your laser tube is properly seated and secured. Vibration can loosen mounting brackets, causing the beam to drift.
Many materials produce smoke and residue during engraving. This accumulates on optics over time. A weekly wipe-down with a soft cloth keeps contamination minimal. Monthly deep cleaning with proper solvents keeps optics performing.
Control Material Movement and Secure Workpieces
Materials that shift during engraving produce misaligned or smeared results.
Your material must stay perfectly still from start to finish. Even millimetre-scale movement ruins accuracy.
Use clamps, pins, or vacuum hold-down systems appropriate to your material. For delicate fabrics, pins or light clamps work. For rigid materials like acrylic or metal, heavier clamps are fine.
Position your material consistently. Mark reference points on your cutting bed so you can place material in the same spot every time. This makes repeating jobs easier and reduces alignment errors.
Check that your cutting bed is level. A tilted bed causes focus to drift across the material surface, making the top edge sharp and the bottom edge fuzzy.
For production runs, create a setup jig. This is a simple frame or template that holds material in the exact position your software expects. Jigs eliminate human error and speed up setup.
Optimise Laser Settings for Your Materials
Laser power, speed, and frequency affect both the quality and consistency of your engraving.
Different materials require different settings. Leather engraves cleanly at moderate power and slow speed. Acrylic needs higher power to cut through. Wood varies by density and grain direction.
Start with your material supplier's recommended settings. Run a test on scrap material. Adjust power and speed incrementally. Look for clean, sharp edges with no charring or fuzziness.
Once you find good settings, document them. Save these as profiles in your software. When you run the same material again, load the profile. This ensures consistency across jobs and operators.
Power drift is common as laser tubes age. If your settings produce good results today but mediocre results in three months, the tube is weakening. You may need to increase power slightly to compensate. Eventually, you'll need to replace the tube.
Frequency (pulse rate) also affects edge quality. Higher frequencies produce smoother edges. Lower frequencies cut faster but may leave visible striations. Find the balance that suits your material and speed requirements.
Test your settings on actual production material before committing to a full batch. A five-minute test run prevents costly mistakes.
Laser engraver accuracy isn't mysterious. It's the result of systematic maintenance, regular testing, and attention to detail. When your machine drifts, you notice it immediately through testing and catch it before it costs you money.
Laserprints supports businesses across the UK that depend on laser engraving for their production. We provide expert maintenance, calibration services, and spare parts to keep your equipment running at peak accuracy. When accuracy problems arise, whether from drift, optical contamination, or mechanical wear, our team diagnoses the issue quickly and gets you back to production. Get in touch to discuss how we can help your operation maintain the precision your customers expect.
Frequently Asked Questions
How do I know if my laser engraver accuracy is declining?
Run test engravings on sample material weekly and measure the results against your baseline specifications using precision callipers. Look for inconsistent line widths, misaligned edges, or drifting text positioning. If measurements deviate by more than 0.5mm from your standard, your accuracy needs attention. Document these test results to track patterns and identify whether the issue is gradual drift or sudden failure.
What's the fastest way to troubleshoot poor laser engraver accuracy?
Check three things first: laser engraver focus adjustment (use the focus probe or test cuts at different heights), laser engraving alignment (verify the crosshair matches your design), and optical cleanliness (inspect mirrors and lenses for dust or damage). Most accuracy problems stem from one of these. If all three check out, move to laser engraver calibration using your machine's built-in test patterns. This systematic approach typically identifies the cause within 30 minutes.
How often should I perform laser engraving accuracy tests?
Test weekly for high-volume production environments, or at minimum before starting a large job. Run a simple test pattern on scrap material, engrave a grid with known dimensions and measure the output. This takes 10 minutes and catches drift before it affects your finished work. After any maintenance, calibration change, or parts replacement, always run a test before returning to production.
Can I improve laser engraver accuracy without professional service?
Yes, for routine maintenance and adjustment. Clean optics monthly, check laser engraver focus adjustment using your machine's built-in tools, verify laser engraving alignment before each job, and keep material secured with appropriate clamps or fixtures. However, if accuracy problems persist after these steps, or if optics are damaged, internal misalignment, or power output is inconsistent, professional diagnostics and repair are essential to avoid compounding the issue.