

Table of Contents
- Why UV Printer Maintenance Decides Your Production Uptime
- Best Practice 1: Follow a UV Printer Daily Maintenance Checklist
- Best Practice 2: Replace Cap Tops and Dampers Before They Fail
- Best Practice 3: Book Professional UV Printer Repair Services at the First Warning Sign
- Best Practice 4: Understand the Cost of UV Printer Downtime Before It Happens
- Best Practice 5: Book Scheduled Servicing Instead of Waiting for Breakdowns
- Common UV Printer Maintenance Mistakes That Cause Repeat Faults
- Frequently Asked Questions
Last Updated: September 16, 2026
Why UV Printer Maintenance Decides Your Production Uptime
UV printer maintenance is the scheduled inspection, cleaning and parts replacement that keeps a UV print engine producing saleable output instead of sitting idle. Neglect it and the consequences compound: blocked nozzles, failed cap tops and contaminated ink lines rarely announce themselves before a deadline. This guide from Laserprints sets out five practices that separate shops with predictable uptime from those firefighting breakdowns every fortnight.
The logic is straightforward. A UV printhead is a precision component with a finite service life, and every missed cleaning cycle, worn seal or dried ink deposit shortens it. What many underestimate is how quickly small faults cascade into full engine failures, and how much a single unplanned stoppage costs in lost orders, overtime and expedited parts.
Below, we cover the five practices that matter most, from daily checks through to scheduled servicing, plus the mistakes that cause repeat faults.
Best Practice 1: Follow a UV Printer Daily Maintenance Checklist
A UV printer daily maintenance checklist is the single highest-return habit in any print shop. It takes minutes to complete and catches the faults that become expensive if left for a week.
What to Check Before the First Print of the Day
Run through these before the first job goes on press:
- Inspect the printhead nozzle plate for dried ink or debris
- Print a nozzle check pattern and compare it against yesterday's
- Confirm the capping station seals cleanly when the carriage parks
- Check ink levels and look for air gaps in the damper lines
- Wipe the wiper blade and confirm it is not deformed or saturated
- Verify the UV lamp or LED array fires at full intensity
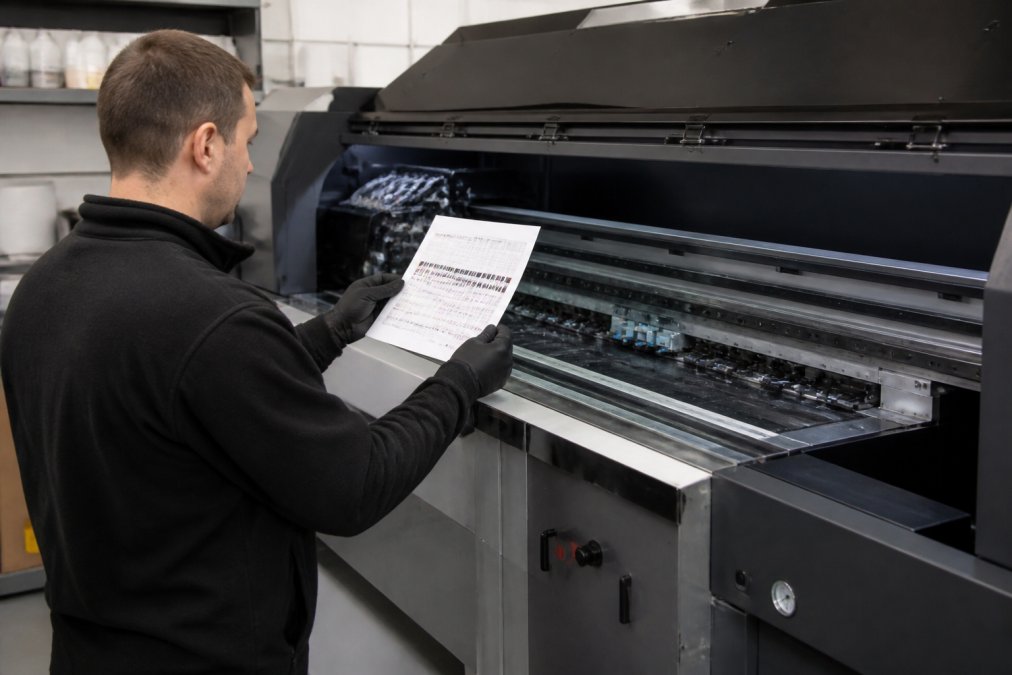
End-of-Shift Tasks That Prevent Overnight Ink Drying
The end of a shift is when most avoidable damage happens. UV ink left on a nozzle plate cures under ambient light and heat, and a cap top that is not sealing properly lets that process start hours before anyone returns.
Before you lock up: park the carriage correctly, confirm the cap top forms a seal, run the prescribed cleaning cycle, and check that the waste ink path is not backing up. A common mistake is skipping the end-of-shift clean because a job ran late. That single omission is how recurring missing nozzles begin.
Best Practice 2: Replace Cap Tops and Dampers Before They Fail
Cap tops and dampers are consumables, not lifetime components, and treating them as such prevents the majority of repeat faults. The cap top seals around the printhead when parked, protecting the nozzle surface from drying and allowing the suction system to pull ink or cleaning fluid through during maintenance cycles. The damper regulates ink delivery and filters contaminants before ink reaches the printhead.
When either wears out, the symptoms show up as print quality problems rather than obvious part failures. Poor cleaning performance, weak suction, ink starvation, air entering the system and recurring missing nozzles all trace back to these two components more often than to the printhead itself.
How to Match the Right Cap Top for Your Printhead
Cap top fittings vary by printhead model and by printer manufacturer, and the orientation matters. I3200 systems use portrait or landscape configurations depending on the capping assembly, while XP600 and L1800/R1390 systems each take their own design.
| Printhead System | Part | Price | Fitting Notes |
|---|---|---|---|
| Epson I3200 | Cap top seal | £14.99 | Portrait or landscape orientation |
| Epson XP600 | Cap top seal | £8.32 | Check mounting points against existing part |
| Epson L1800 / R1390 | Cap top seal | £12.49 | Compare fitting and mounting points |
| Epson I3200 / XP600 | UV ink damper | £12.49 | Set of 4; check connection type |
| Epson XP600 | UV ink damper | £12.49 | Check connection type |
Before ordering, compare the fitting orientation and physical design against the part you are removing. If you are unsure, send your printer model and a photograph of the existing component and the correct replacement can be identified for you.
Best Practice 3: Book Professional UV Printer Repair Services at the First Warning Sign
Professional UV printer repair services exist to catch faults while they are still cheap to fix. The warning signs are consistent: a nozzle check that never fully recovers, a persistent banding pattern, unusual noise from the carriage, or a machine that needs cleaning cycles it did not need last month.
The temptation to keep running is understandable, particularly when a deadline is close. But a printhead that is failing gradually will fail completely, and it will usually do so mid-job. Remote diagnosis can resolve software, RIP configuration and workflow faults without a site visit, and where the fault is hardware-related, that is identified before anyone travels.

Where the problem is mechanical or ink-system related, a site visit lets a qualified engineer test components and identify the root cause rather than the symptom. If specialist parts are needed, you get a clear picture of what is required before committing to the repair.
Best Practice 4: Understand the Cost of UV Printer Downtime Before It Happens
The cost of UV printer downtime is not the repair invoice. It is the orders you cannot fulfil, the customers who go elsewhere while your machine sits idle, the overtime to catch up, and the expedited shipping on parts.
Most production managers can quote their hourly output value without checking. Multiply that by the hours a typical fault takes to diagnose, source parts for and repair, and the real figure becomes clear. A workshop-based repair on a DTF or UV printer is usually turned around in two to three working days from delivery, which is a very different number from a three-week wait.
That calculation is what makes preventive maintenance straightforward to justify.
Best Practice 5: Book Scheduled Servicing Instead of Waiting for Breakdowns
Scheduled servicing is cheaper than reactive repair, and the gap widens the longer you run production equipment. A planned service covers the components that degrade predictably: cap tops, dampers, wiper blades, filters and ink lines. It also catches the early signs of printhead degradation while recovery is still possible.
Common UV Printer Maintenance Mistakes That Cause Repeat Faults
Repeat faults almost always trace back to one of four habits.
Frequently Asked Questions
How often should you perform maintenance on a UV printer?
Daily maintenance keeps a UV printer reliable: run a nozzle check before the day's first job, wipe the capping station, and confirm the carriage parks correctly. Weekly tasks include inspecting cap tops and dampers for wear, checking ink levels and clearing waste ink. Monthly, review the capping assembly and ink lines for blockages. Skipping these routines lets UV ink cure inside nozzles, which is far harder to reverse than a routine wipe-down.
What are the consequences of neglecting UV printer maintenance?
UV ink dries quickly, so neglected printers develop blocked nozzles, poor suction and ink starvation. A worn cap top stops sealing properly, allowing the nozzle plate to dry out while parked. Dampers that are blocked or damaged cause inconsistent ink flow and missing nozzles. These faults build up quietly, then surface as failed print runs, wasted substrates and emergency repair bills, which is why a daily maintenance checklist matters more than occasional deep cleans.
How do you prevent printhead clogging in UV printers?
Prevention comes down to routine and parts condition. Run daily nozzle checks, keep the capping station clean, and make sure the carriage parks on a cap top that seals properly. Replace worn cap tops and ink dampers before they fail, since both directly affect suction and ink delivery. For a printhead that is already partially blocked, a workshop printhead cleaning service can recover ink flow and restore blocked nozzles where possible, often avoiding a full replacement.
What is the correct procedure for a long-term UV printer shutdown?
For shutdowns longer than a few days, flush the ink system with cleaning fluid, cap the printhead securely and protect the nozzles from air exposure. Store the machine in a stable, dust-free environment and follow the manufacturer's guidance for your specific printhead. On restart, run cleaning cycles and a nozzle check before production. If you are unsure about the procedure, remote support can guide you through flushing and restart steps without a site visit.
Why is professional maintenance essential for industrial UV printers?
Industrial UV printers run long shifts under heavy ink loads, so small faults escalate quickly. Professional servicing catches worn cap tops, tired dampers and suction problems before they cause failed prints or printhead damage. Workshop repairs typically turn around in 2-3 working days, and a call-out service diagnoses faults on site, which limits the cost of UV printer downtime compared with waiting for a full breakdown.
Unplanned downtime is the most expensive line item in any print operation, and most of it is preventable. Laserprints specialises in keeping laser, DTF and UV print engines running for production businesses, with expert repair and servicing, genuine spare parts including I3200, XP600 and L1800/R1390 cap tops and UV ink dampers, remote support for software and workflow faults, and rapid response when a machine goes down. Get started with Laserprints and keep your production schedule intact.