

Table of Contents
- Why UV Printer Banding Appears: The Four Root Causes
- How to Run a UV Printer Nozzle Check Procedure
- Mechanical Causes: Media Feed, Head Height and Curing
- Fixing Horizontal Banding Step by Step
- Preventative Maintenance for Industrial UV Printers
- Professional UV Printer Servicing Cost: What You Are Paying For
- Frequently Asked Questions
Last Updated: 11 September 2026
Why UV Printer Banding Appears: The Four Root Causes
Banding rarely appears without warning, and it almost never has a single cause. Troubleshooting UV printer banding issues starts with accepting that the fault sits in one of four places: ink delivery, the printhead itself, the mechanical media path, or the curing and environmental setup. Miss that distinction and you will clean a head that was never dirty.
UV printer banding is the appearance of regular horizontal or vertical stripes across a cured print, caused by inconsistent ink deposition or partial nozzle dropout. The pattern tells you where to look. Horizontal banding usually points to feed or head-height problems; vertical banding points to individual nozzles.
Here is the diagnostic order that saves the most time:
- Ink delivery faults (dampers, filters, air locks)
- Printhead and nozzle problems (blockage, damage, electrical faults)
- Mechanical causes (media feed, head height, curing)
- Environmental factors (temperature, humidity, static)
Work through them in that order. Most engineers who chase the head first end up replacing parts they did not need to.
Ink Delivery Faults: Dampers, Filters and Air Locks
The damper is the most underrated component in the entire ink system. A failing UV ink damper cannot hold consistent back-pressure, so ink reaches the head in uneven pulses. That produces banding that looks intermittent and shifts position between prints.

A common mistake is assuming a damper lasts forever. They degrade, they clog with pigment, and they draw air. If your banding moves around the page rather than sitting in a fixed line, suspect the damper before the head. Replacement dampers are inexpensive, and fitting one takes minutes rather than hours.
Printhead and Nozzle Problems
Nozzle dropout is the classic cause, and it is the one most operators identify correctly. Partial blockages, dried UV ink at the nozzle plate, and physical damage to the nozzle row all produce hard-edged bands that stay in the same place print after print.
The thing nobody tells you about UV ink is how quickly it cures under stray light. A head left uncapped in a bright workshop can start to skin over within a working shift (PubMed). Keep the capping station clean and the head parked.
How to Run a UV Printer Nozzle Check Procedure
A UV printer nozzle check procedure is a diagnostic print of a test pattern that reveals which nozzles are firing, which are misfiring and which are blocked entirely. Run it before every production shift, not after a fault appears.
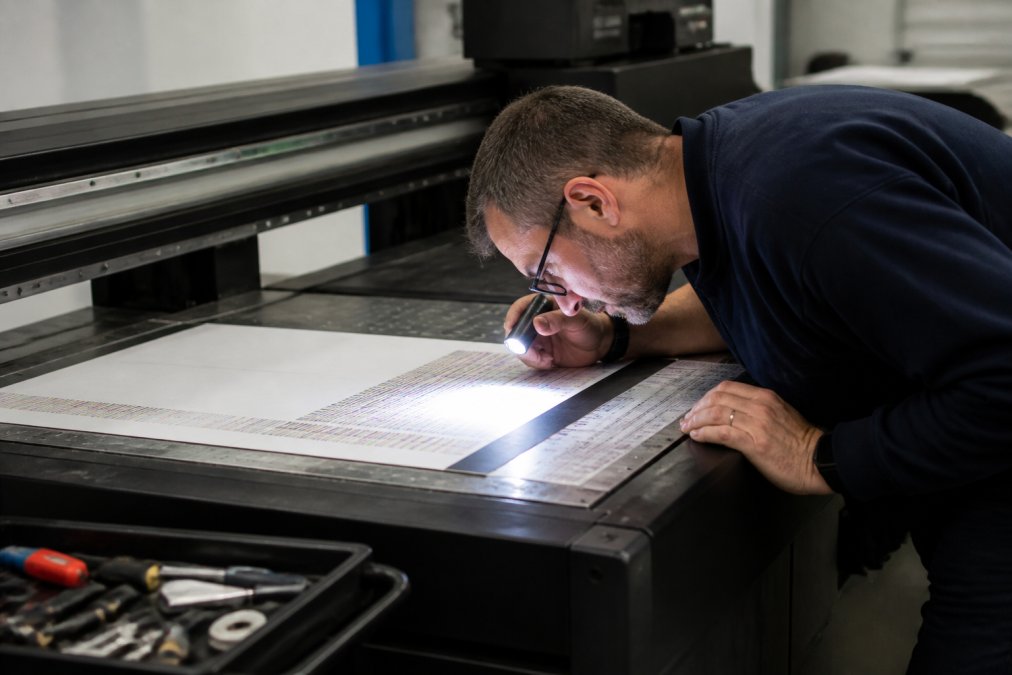
The sequence that works:
- Park the head and run the printer's built-in nozzle check pattern
- Examine the pattern under good light, using a torch at a shallow angle
- Note the position of every gap, not just the count
- Run one cleaning cycle and re-check
- If gaps persist after two cycles, stop cleaning and diagnose
Step five matters more than the rest. Repeated cleaning cycles waste ink, stress the head and can flood the capping station (ricoh.com). If two cycles do not recover the nozzles, the problem is not ink residue.
When Cleaning Recovers the Printhead and When It Does Not
Cleaning recovers nozzles blocked by dried ink or light contamination. It does not recover nozzles lost to air in the line, a collapsed damper, electrical failure in the head, or physical damage to the nozzle plate.
If the same nozzles fail after every clean, stop. That pattern means the fault is upstream or the head is failing. Continuing to clean simply burns ink and time.
Mechanical Causes: Media Feed, Head Height and Curing
Banding that repeats at a fixed interval across the media usually traces back to the mechanics. Feed roller tension, encoder strip contamination and head height all change the distance between passes.
Head height is the one operators adjust most often without realising the consequence. Raising the head to clear a thick substrate increases the drop distance, which softens dot placement and widens the band (epson.com). Set the height to the substrate, not to the thickest material in the shop.
Curing sits in the same category. Under-cured ink looks dull and can smear; over-cured ink can shrink slightly at the band edge, exaggerating a stripe that was barely visible beforehand. Check lamp output and cure settings before you touch the head.
Fixing Horizontal Banding Step by Step
Horizontal banding is a common complaint, and the fix follows a fixed order. Work through it methodically rather than jumping to the head.
| Step | Check | Likely Fix |
|---|---|---|
| 1 | Nozzle check pattern | Cleaning cycle, then assess |
| 2 | Damper condition | Replace UV ink damper |
| 3 | Ink line for air | Purge and re-prime |
| 4 | Head height setting | Reset to substrate thickness |
| 5 | Feed roller tension | Adjust or replace rollers |
| 6 | Curing lamp output | Replace lamp or adjust settings |
Most horizontal banding resolves at steps two or three. If you reach step six without a fix, the head itself is the likely culprit and a bench assessment is the sensible next move.

Preventative Maintenance for Industrial UV Printers
Preventative maintenance for industrial UV printers is a scheduled routine of cleaning, inspection and part replacement that keeps ink delivery consistent and catches wear before it becomes downtime. It is cheaper than reactive repair, and considerably cheaper than lost production.
A workable weekly and monthly routine:
- Run a nozzle check at the start of every shift
- Wipe the capping station and wiper blade daily
- Inspect dampers weekly for ink pooling or air
- Check the encoder strip for ink mist and dust
- Verify head height against your common substrates
- Log lamp hours and replace on schedule, not on failure
- Replace dampers and filters on a fixed interval
The interval depends on duty cycle. A machine running two shifts will need dampers replaced far sooner than one running occasional jobs. Track it rather than guessing.
Professional UV Printer Servicing Cost: What You Are Paying For
Professional UV printer servicing cost reflects the diagnostic time, the engineer's expertise and the parts required, not simply the visit itself. A service that identifies the true root cause on the first visit is almost always cheaper than three visits that treat symptoms.
When you book a service, you are paying for:
- Diagnostic assessment of the full ink path, not just the head
- Access to specialist equipment for head recovery and testing
- Genuine spare parts, including dampers and filters matched to your head
- A written record of what was found and what was replaced
- Preventative recommendations to reduce repeat failures
Where a printhead is partially blocked but not beyond recovery, a bench cleaning service can restore flow without the cost of a new head. Laserprints offers a Printhead Cleaning Service at £49.99, where printheads are assessed and cleaned by print systems engineers before replacement is considered.

Parts matter here too. A worn I3200 XP600 UV Ink Damper at £12.49 or an XP600 UV Ink Damper at £12.49 costs a fraction of a head and resolves a large share of intermittent banding faults. Keeping one on the shelf is sensible practice.
Frequently Asked Questions
What causes horizontal banding on UV flatbed printers?
Horizontal banding usually comes from four sources: partially blocked nozzles, air in the ink line, a failing damper, or inconsistent media feed. UV ink cures under light, so any ink left sitting in the head or line can thicken and restrict flow. Check the nozzle test pattern first, then inspect the dampers and ink line for air. If the band position shifts between prints, the fault is usually ink delivery rather than mechanics.
Can clogged printheads cause banding in UV ink?
Yes, and it is the most common cause of UV printer banding. When nozzles block, the head lays down less ink across that row, leaving a visible line. A nozzle check will show which channels have dropped out. If a head cleaning cycle or two does not recover them, a Printhead Cleaning Service can restore flow on partially blocked heads before you consider replacement.
How often should I perform preventative maintenance on UV print engines?
Daily: run a nozzle check and wipe the capping station. Weekly: inspect dampers and check for air in the ink line. Monthly: clean the encoder strip and check head height. Replace dampers every 6 to 12 months depending on volume. Preventative maintenance for industrial UV printers costs far less than emergency callouts, and it keeps banding from becoming a recurring production problem.
When should I call a professional for UV printer servicing?
Call a professional when banding persists after two or three cleaning cycles, when more than a few nozzles remain blocked, or when you see air bubbles in the ink line that do not clear. Also call if the fault returns within a day of fixing it. Professional UV printer servicing cost is far lower than the cost of a ruined production run or a damaged printhead.
Banding is a symptom, not a diagnosis, and the businesses that recover fastest are the ones that resist the urge to clean first and ask questions later. Laserprints supports print operations with expert repair, scheduled maintenance, genuine spare parts and remote support, so a banded print becomes a twenty-minute fix rather than a lost day. Get started with Laserprints and keep your UV print engines running at full production.