

Table of Contents
- What You'll Need Before Troubleshooting
- Step 1: Check Power Supply and Connections
- Step 2: CO2 Laser Power Supply Troubleshooting
- Step 3: Inspect the Laser Tube and Optics
- Step 4: Test Software and Job Settings
- Laser Engraver Maintenance Schedule to Prevent Firing Issues
- Laser Engraver Safety Standards and When to Seek Professional Help
- Common Mistakes to Avoid
- Frequently Asked Questions
Last Updated: 26 September 2026
What You'll Need Before Troubleshooting
Before troubleshooting your laser engraver not firing, gather a multimeter, machine manual, clean cloth, and safety glasses to prevent wasted time and equipment damage.
Have your machine's model number, purchase date, and power specifications ready before calling for support.
Document what happened before firing stopped: unusual sounds, error codes, whether it stopped mid-job or failed to start. These details help identify the root cause.
| Item | Purpose | Priority |
|---|---|---|
| Multimeter | Test electrical connections | High |
| Safety glasses | Eye protection | High |
| Machine manual | Reference specifications | High |
| Clean cloth | Inspect optics safely | Medium |
| Torch | Inspect tube condition | Medium |
Step 1: Check Power Supply and Connections
Power supply problems cause most firing failures. Start here.
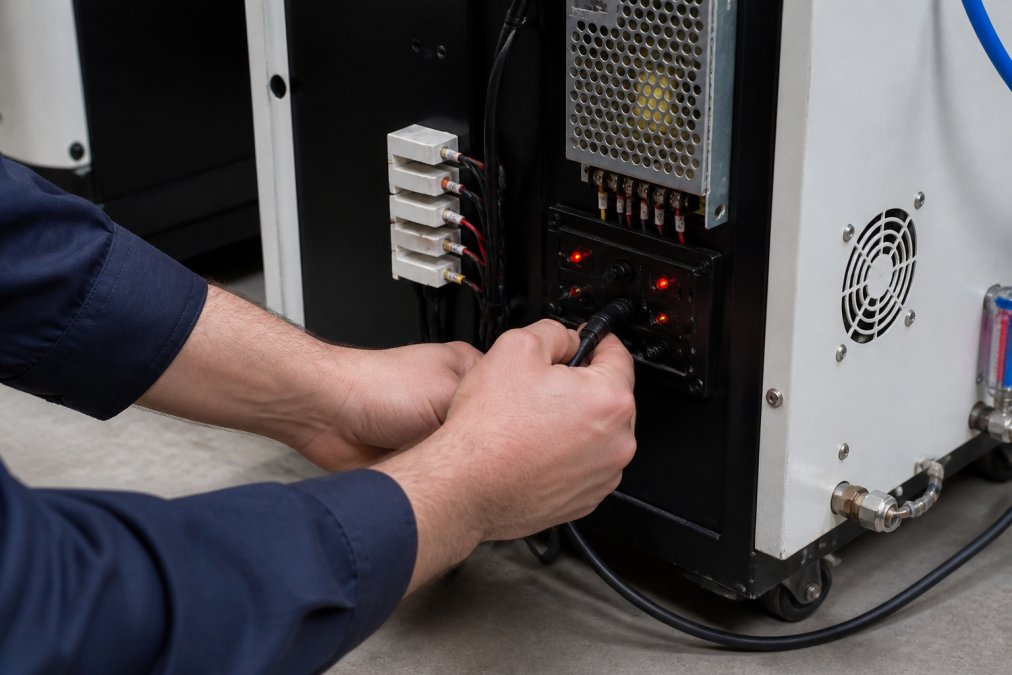
Inspect power cables for damage or fraying. Unplug the machine and firmly reseat every cable at both ends.
Test the power outlet with a different device. Some machines require dedicated circuits; shared outlets cause voltage drops that prevent firing.
Check control panel LED indicators. No lights mean power isn't reaching the board; lights on but no firing means the problem is downstream.
Test the emergency stop button by pressing and releasing it fully. A stuck button prevents firing.
Measure voltage at the power input with your multimeter and compare to specifications. Voltage below minimum prevents firing.
Check for blown fuses near the main power entry. Replace with the exact amperage rating specified in your manual.
Step 2: CO2 Laser Power Supply Troubleshooting
The laser power supply generates the 10,000+ volts needed to fire the CO2 tube and fails more often than the tube itself. It's recognisable by its size and thick cables running to the tube.
Listen for clicking (power supply attempting to fire but blocked) or humming without clicking (no firing signal received).
Check control connections between the board and power supply. Reseat every connector firmly.
Skip high-voltage testing without proper equipment; contact a professional instead.
Look for burnt, discoloured, or cracked components. Damaged power supplies must be replaced.
Check for error codes on your control panel and consult your manual. This often points directly to the problem.
Power supplies over seven years old degrade as electrolytic capacitors dry out. Replacement is often more cost-effective than repair.
The team at Laserprints can diagnose power supply faults remotely using our Remote Support Service. Describe the sounds and behaviour you observe, and we'll guide you through targeted tests.
Step 3: Inspect the Laser Tube and Optics
A failing laser tube or dirty optics prevent firing or cause weak output. This step requires careful inspection but no special tools.
Examine the laser tube for cracks, discolouration, or cloudiness. Cracks require replacement; cloudiness suggests gas degradation or moisture.
Check electrodes for blackening or pitting, indicating the tube is near end of life. Most tubes last 2,000 to 5,000 hours.
Clean mirrors and lenses with a soft cloth and gentle circular motions. Never use paper towels. Use lens cleaning solution for stubborn dirt.
Check mirror mounts are secure. Do not force anything; mirrors are fragile and expensive.
Verify the beam path is clear from tube to work area. Remove any obstructions.
Observe the tube glow when firing: bright red/orange is healthy, no glow means dead, dim glow suggests failure.
Tubes over five years old showing wear should be replaced for consistent performance.
Step 4: Test Software and Job Settings
Software problems and incorrect settings cause firing failures that have nothing to do with hardware. Test these before assuming your machine has a mechanical fault.
Open your design software and create a simple test file. Use a small rectangle or circle, something quick to engrave. Send this test job to the laser. If the laser fires for the test job, your software is working and the problem lies elsewhere.
Check your job settings in the software. Verify that power is set above zero. Many users accidentally set power to 0% or leave it at a default low value. Increase power to 50% for your test. If the laser fires at 50% power, your settings were the problem.
Inspect the speed setting. If speed is set too high, the laser might appear not to fire because it moves too fast to see the mark. Reduce speed to 10% for testing. A visible mark confirms the laser is firing.
Test the focus setting. If the lens is out of focus, the laser beam spreads too wide and lacks power. The beam might not mark the material even though it's firing. Refocus the lens using your machine's autofocus feature or manual adjustment.
Check for software errors or warnings. Most design software displays messages about connection problems or hardware issues. Read these messages carefully, they often point directly to the problem.
Verify the laser is selected as your output device in the software. Some machines have multiple output options. Confirm you're sending jobs to the correct laser engraver, not a printer or plotter.
Test with a different design file. Create a new, simple design from scratch. If the new file works but your original doesn't, the problem is in your file or its settings. Recreate the design in a fresh file.
Restart your control software completely. Close it fully and reopen it. Software can develop temporary glitches that a restart fixes. This simple step resolves many apparent hardware problems.
Laser Engraver Maintenance Schedule to Prevent Firing Issues
Regular maintenance prevents most firing problems from developing. A consistent schedule keeps your machine reliable and extends its life.
Clean optical components every two weeks if you use your machine daily. Dust accumulates quickly and degrades beam quality. Cleaning takes 15 minutes and prevents power loss over time.
Inspect power connections monthly. Vibration from the machine can loosen cables over time. A quick visual check catches loose connections before they cause failures.
Test the emergency stop button monthly. Press it and release it fully. Confirm the machine stops immediately. A sluggish or stuck button is a safety issue and prevents normal operation.
Check the laser tube condition every three months. Look for discolouration, cracks, or cloudiness. Document the tube's appearance so you notice changes over time.
Replace the air filter every six months if your machine uses one. A clogged filter reduces cooling efficiency. Poor cooling accelerates component failure.
Inspect mirrors and lenses quarterly. Look for dust, fingerprints, or damage. Clean gently if needed. Replace any damaged optics immediately.
Test firing at low power monthly. Mark a piece of material at 10% power. Compare the mark to previous tests. A noticeably weaker mark indicates the tube is degrading.
| Maintenance Task | Frequency | Time Required |
|---|---|---|
| Clean optics | Every 2 weeks | 15 minutes |
| Check power connections | Monthly | 10 minutes |
| Test emergency stop | Monthly | 5 minutes |
| Inspect laser tube | Quarterly | 10 minutes |
| Replace air filter | Every 6 months | 20 minutes |
| Test firing power | Monthly | 10 minutes |
Keep detailed records of all maintenance and repairs. Note dates, issues found, and actions taken. This history helps identify patterns and predict future problems.
Professional servicing once yearly catches problems early. A technician inspects components you might miss and replaces worn parts before failure.
Laser Engraver Safety Standards and When to Seek Professional Help
Laser engravers are powerful machines. Safety standards exist to protect operators and prevent damage. Know when to stop troubleshooting and call a professional.
The Health and Safety Executive guidance on laser safety outlines legal requirements for laser equipment in the workplace. Your machine must meet these standards. Never modify safety features or disable interlocks.
High-voltage components inside your machine are dangerous.
Call a professional if:
- The laser tube is cracked or leaking gas
- The power supply shows visible damage
- You hear unusual sounds from electrical components
- The machine doesn't respond to any troubleshooting steps
- You're uncomfortable working with electrical systems
Common Mistakes to Avoid
Many users make the same mistakes when troubleshooting a laser engraver not firing. Avoiding these saves time and prevents further damage.
Frequently Asked Questions
Why is my laser engraver power on but not firing?
A laser engraver not firing despite being powered on typically points to one of three issues: the laser tube may be faulty or reaching end-of-life, the high-voltage power supply could be malfunctioning, or software settings may be preventing the laser from firing. Start by checking that your RIP software has the laser output enabled, your job file contains vector paths (not raster images set to 0% power), and that the laser tube water cooling system is functioning. If these check out, the power supply or tube itself usually requires professional diagnosis.
How often should I perform maintenance on my laser engraver to prevent firing issues?
A structured laser engraver maintenance schedule prevents most firing problems. Regular preventative maintenance extends tube life and catches power supply degradation before it stops your machine completely.
What are the common causes of a laser engraver stopping mid-job?
Mid-job failures usually stem from overheating (inadequate water cooling or blocked cooling lines), software crashes or driver issues, loose electrical connections that vibrate free during operation, or a failing laser tube that weakens as it heats up. Less commonly, compressed air system failures can interrupt the air assist needed to clear cutting debris. Check your cooling system first, then inspect all connectors and cable routing for damage or loose contacts.
Is it safe to troubleshoot a laser engraver myself?
Basic checks like inspecting cooling lines, cleaning optics, and verifying software settings are safe. However, never attempt to repair internal high-voltage components, the laser tube itself, or the power supply, these carry lethal electrical charge even when the machine is switched off. Laser engraver safety standards require qualified personnel for any work involving high-voltage systems. If your troubleshooting identifies a power supply or tube fault, contact a professional repair service like Laserprints' Call-Out Service to ensure safe diagnosis and repair.