

Table of Contents
- What Causes DTF Printer Banding
- Step 1: Run a Nozzle Check to Diagnose the Problem
- Step 2: Clean the Printhead When Nozzles Are Blocked
- Step 3: Check and Replace Your DTF Printer Damper
- Step 4: Inspect Ink Lines and Connections
- DTF Printhead Maintenance to Prevent Future Banding
- When to Call a Professional
- Conclusion
- Frequently Asked Questions
Last Updated: 1 September 2026
What Causes DTF Printer Banding
DTF printer banding appears as visible horizontal or vertical lines across your printed garments, disrupting the smooth colour gradients and solid fills you'd expect from a professional print. The issue isn't random, it's a symptom of something specific going wrong in your ink delivery or printhead system.
Banding typically stems from one of three root causes: blocked nozzles in your printhead, inconsistent ink flow through your damper system, or air bubbles trapped in your ink lines. When nozzles fail to fire correctly, they create gaps in the print pattern (peer-reviewed research). When your damper can't regulate ink pressure properly, the printhead receives ink in uneven pulses (peer-reviewed research). When air enters the system, it disrupts the continuous flow that keeps nozzles firing consistently.
The reason this matters is straightforward: banding is expensive. A single banded print is scrap. If your DTF printer is producing banded output regularly, you're losing orders, burning through substrate, and watching your profit margins disappear. The good news is that most banding issues are fixable without replacing your entire machine.
At Laserprints, we diagnose and resolve DTF printer issues across UK print shops. What we've observed is that teams often wait too long before addressing banding. They'll run a few test prints, see the lines, and assume the machine is failing. In reality, the problem is usually caught early enough that a straightforward cleaning or component replacement solves it completely.
Step 1: Run a Nozzle Check to Diagnose the Problem
The nozzle check is your diagnostic starting point. It tells you whether your printhead is firing all its nozzles or whether some are blocked. Run this test first before attempting any cleaning or replacement work.
Access your printer's menu system and select the nozzle check function. Your DTF printer will print a test pattern, usually a series of vertical lines or dots, one for each nozzle in your printhead. The output should be solid and unbroken. If you see gaps, missing lines, or thin spots in the pattern, you've found your problem: those gaps correspond to nozzles that aren't firing.
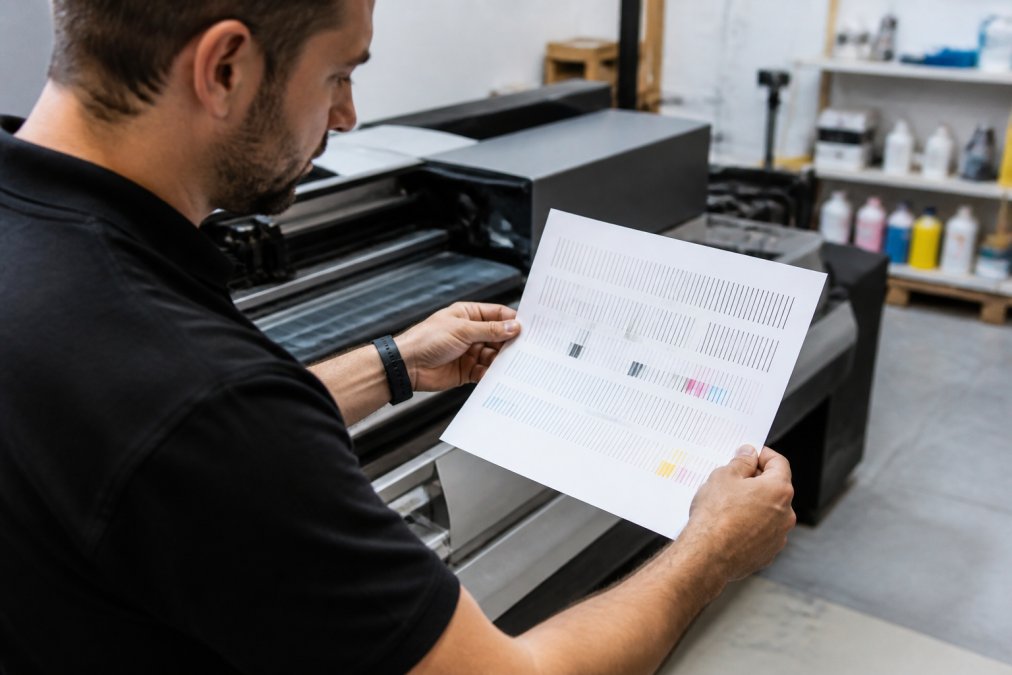
Examine the test print under good lighting. Look for consistent colour density across the entire pattern. Faint areas or completely missing sections tell you which nozzles need attention. Some printers show you the results on screen as well, highlighting which nozzle rows are blocked.
If your nozzle check shows all nozzles firing and the pattern is solid, your banding might be caused by something else, possibly an ink line issue or a mechanical problem with the carriage. If you see missing nozzles, move directly to Step 2.
Step 2: Clean the Printhead When Nozzles Are Blocked
Blocked nozzles are usually caused by dried ink, dust contamination, or ink that's been sitting in the nozzle chamber too long. A proper cleaning can often restore full function without replacing any components.
Most DTF printers have an automatic cleaning cycle built into the menu. Start with a soft clean, this runs ink through the nozzles at low pressure to dislodge loose blockages. Run the soft clean, then check your nozzles again. If you still see gaps, run a medium clean. If those gaps persist after two cleaning cycles, you'll need a more aggressive approach.
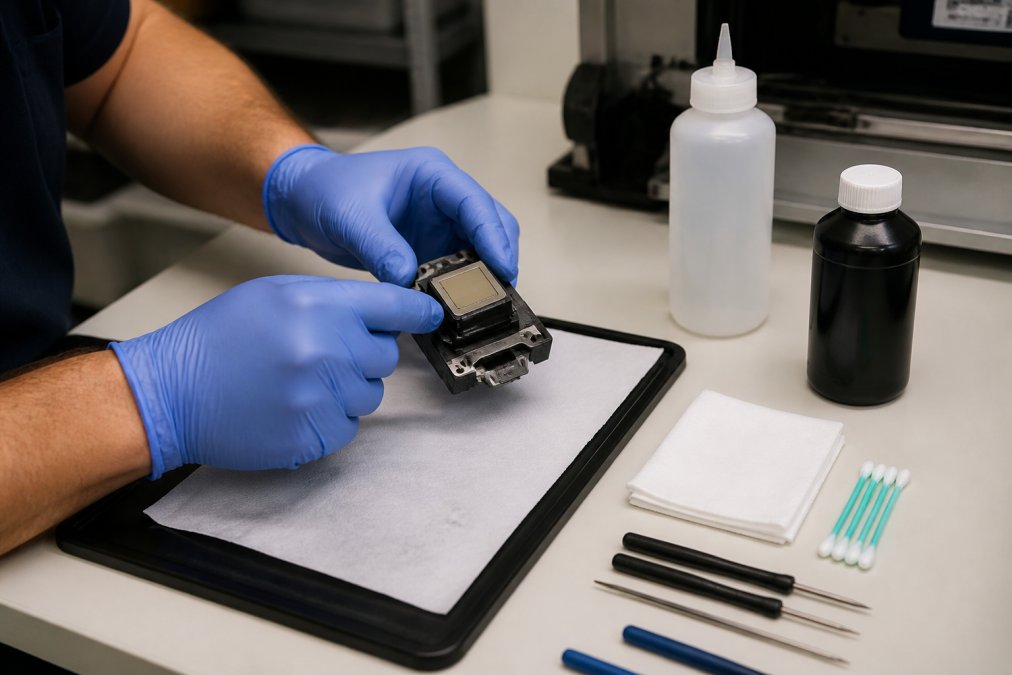
For stubborn blockages, you have two options. The first is to use your printer's deep clean or head soak function, which holds ink against the nozzles for an extended period to soften dried material. This takes time, usually 30 minutes to several hours, but it's gentler on the printhead than manual cleaning.
If the deep clean doesn't work, manual cleaning becomes necessary. This requires removing your printhead from the machine (follow your manufacturer's instructions carefully), placing it nozzle-side-down on a lint-free cloth soaked in cleaning solution, and letting it soak for 15 to 30 minutes. The dried ink will gradually soften and release (peer-reviewed research). Never scrub or apply pressure directly to the nozzle plate, you'll damage the delicate nozzle openings.
After soaking, gently rinse the printhead with distilled water and allow it to dry completely before reinstalling. Run another nozzle check once the printhead is back in place.
Many teams find that professional printhead cleaning delivers better results than in-house attempts, especially for heavily blocked heads. Laserprints offers a Printhead Cleaning Service where our experienced engineers assess your printhead, apply specialist cleaning techniques, and restore blocked nozzles to full function.

Step 3: Check and Replace Your DTF Printer Damper
Your ink damper regulates pressure and filters debris before ink reaches the printhead. When a damper fails, ink flow becomes inconsistent, which directly causes banding. Damper issues are one of the most common causes of banding we see, and they're straightforward to fix.

A failing damper usually shows these signs: banding that appears even after you've cleaned the nozzles, inconsistent ink saturation across your prints, or nozzles that fire initially but then stop mid-print. If your nozzle check showed all nozzles firing but you still have banding, your damper is the likely culprit.
Replacing a damper is a task most production teams can handle themselves. First, identify which damper corresponds to your printhead type. Laserprints stocks replacement dampers for the most common DTF printhead systems. An I3200 DTF Ink Damper costs £12.49 and is compatible with Epson I3200 systems. For XP600 heads, the XP600 DTF Ink Damper is also £12.49. If you're running an older R1390 or L1800 system, the R1390 L1800 CMYK Ink Damper is available at £8.32.

Before replacing, turn off your printer and allow the system to depressurise. Locate your damper, it sits between your ink supply and your printhead. Disconnect the inlet and outlet tubing carefully (have a cloth ready to catch any residual ink). Remove the old damper and install the new one, ensuring all connections are tight. Run a cleaning cycle to purge air from the system, then run a nozzle check.
Step 4: Inspect Ink Lines and Connections
Air in your ink lines is invisible but devastating. A single air bubble trapped between your ink supply and printhead will cause banding because the printhead receives air instead of ink when that bubble passes through. This is why ink line integrity matters.
Start by visually inspecting every connection point. Look for loose tubing, cracks, or any place where ink might be leaking. Even a hairline crack that's weeping just one drop per hour will allow air to be drawn in when the printhead creates negative pressure during firing. Tighten any loose connections by hand first, don't over-torque, as this can crack fittings.
Next, check your ink supply system. If you're using an external ink bottle, ensure the feed tube is submerged in ink and the bottle cap is sealed properly. Many banding issues trace back to an air leak at the bottle connection point. If you're using a cartridge system, verify that the cartridge is fully seated and the protective tape has been completely removed.
Run a purge cycle to force ink through the lines and expel any trapped air. Your printer's menu should have a purge or prime function. This cycle pressurises the ink system and pushes air bubbles out through the printhead. After purging, run a nozzle check. If air was the problem, your nozzles should now fire consistently.
If banding persists after purging and you suspect a more serious leak, inspect the underside of your printer for ink pooling. A pool of ink under the machine indicates a line rupture or connection failure. Locate the leak, disconnect the affected line, and inspect it for cracks. Replace the tubing if it's damaged, ink lines are inexpensive and quick to swap out.
DTF Printhead Maintenance to Prevent Future Banding
Prevention is far more cost-effective than repair. A simple maintenance routine keeps your DTF printer producing clean output and avoids the downtime that banding creates.
Run a nozzle check at the start of every production day. This takes two minutes and tells you immediately whether your printhead is healthy. If you see any missing nozzles, address them that day before they worsen. A single missing nozzle today becomes five missing nozzles by tomorrow if left untreated.
Perform a soft cleaning cycle weekly, even if your nozzle checks look perfect. This preventative cleaning keeps ink flowing smoothly and prevents the dried ink buildup that leads to blockages. Think of it like changing your oil, you're maintaining the system before problems develop.
Check your ink supply levels regularly and top up before you run empty. Running an empty ink supply allows air to enter the system. Similarly, inspect your ink lines monthly for cracks, loose connections, or signs of leakage. Replace any tubing that shows wear before it fails completely.
Store your DTF printer in a clean, temperature-stable environment. Dust contamination is a common cause of damper failure, and temperature swings can cause ink viscosity to change, leading to flow problems. If your printer will sit unused for more than a week, run a cleaning cycle before shutting down to prevent ink from drying in the nozzles.
When to Call a Professional
Some banding issues are beyond in-house troubleshooting. Knowing when to escalate saves time and prevents further damage.
If you've run a nozzle check, cleaned the printhead twice, replaced your damper, and inspected your ink lines but banding persists, the problem is likely mechanical. Your carriage rail might be misaligned, your printhead might be damaged, or your printer's pressure regulation system might have failed. These issues require specialist equipment to diagnose and fix properly.
If your printhead has physical damage, visible cracks, nozzle plate deformation, or ink leaking from the head itself, don't attempt repair. A damaged printhead can't be cleaned back to function and will only get worse. Professional replacement is your only option.
If you're uncertain whether your issue is a damper, nozzle blockage, or something more serious, don't guess. Spending two hours on the wrong fix costs you more than calling a professional immediately. The Laserprints team can diagnose your issue remotely or arrange an on-site visit if needed. We handle DTF, laser, and UV print engines across the UK, and we understand the urgency of production downtime. Our typical response time is 24 to 48 hours, and most repairs are completed within a week.
Conclusion
DTF printer banding is frustrating, but it's almost always fixable. A methodical approach, starting with a nozzle check, moving to cleaning if needed, then checking your damper and ink lines, resolves the majority of cases. The key is addressing banding early, before it becomes a chronic production problem.
If you're dealing with persistent banding or you'd prefer professional support, Laserprints specialises in keeping DTF printers running at peak performance. We provide expert diagnostics, printhead cleaning services, replacement dampers, and rapid support across the UK. Shop our range of genuine DTF spare parts and services today to keep your equipment producing flawless output.
Frequently Asked Questions
Q: What causes horizontal lines on DTF prints?
A: Horizontal lines, or banding, occur when ink fails to flow evenly from the printhead to the film. Common causes include blocked nozzles, faulty dampers, air bubbles in the ink lines, or inconsistent ink supply pressure. A clogged printhead is the most frequent culprit. Running a nozzle check will reveal which nozzles are firing and help pinpoint whether the issue is blockage or a deeper ink delivery problem. Address banding immediately, as it worsens quickly and affects every print until resolved.
Q: How often should I perform a nozzle check on my DTF printer?
A: Perform a nozzle check weekly during regular production and before every large job. If your printer sits idle for more than a few days, run a nozzle check before resuming work. Consistent nozzle monitoring is an effective preventative measure for DTF printhead maintenance and can help reduce downtime and repair costs.
Q: Can a faulty damper cause banding in DTF printing?
A: Yes. A faulty damper directly causes banding because it fails to regulate ink pressure or filter contaminants effectively. When the damper is worn or clogged, ink supply becomes inconsistent, leading to uneven colour saturation and horizontal lines across prints. If your nozzle check shows all nozzles firing but banding persists, the damper is likely the problem. DTF printer damper replacement is straightforward and affordable, dampers typically cost £8-£13, making this one of the most cost-effective fixes you can perform.
Q: How do I know when to replace my DTF printer dampers?
A: Replace dampers every 6-12 months depending on usage volume, or immediately if banding appears after ruling out printhead clogs. Dampers degrade silently; you won't see obvious signs until print quality drops. If you run high-volume production, replace dampers proactively every six months as part of routine maintenance. Replacement is quick and inexpensive, waiting until failure causes downtime and potential printhead damage. Laserprints stock dampers for most common DTF systems, including I3200, XP600, and R1390 models, available from £8.32.
This article was written using GrandRanker