

Table of Contents
- Why Your Laser Printer Is Producing Faded Prints
- Check and Replace the Toner Cartridge
- How to Make Laser Printer Print Darker
- Clean the Laser Printer Drum Unit
- Diagnose Faded Laser Prints on One Side
- Common Mistakes to Avoid When Fixing Faded Prints
- When to Call a Professional Technician
- Frequently Asked Questions
Last Updated: October 7, 2026
Why Your Laser Printer Is Producing Faded Prints
Faded laser printer prints are one of the most common issues we see in commercial printing operations. The problem usually stems from one of three sources: low toner levels, a worn drum unit, or incorrect printer settings. Understanding which cause is behind your faded prints saves time and money.
Faded output doesn't mean your machine is broken. It means something inside needs attention. The good news is that most causes are straightforward to diagnose and fix yourself before calling for professional help.
The fastest route to darker, sharper prints is knowing where to look first.
Check and Replace the Toner Cartridge
The toner cartridge is where your prints get their colour and density. When toner runs low, output becomes lighter and fainter across the entire page.
Check your toner level first. Most modern laser printers display toner status on the control panel or via software on your computer. If the cartridge shows low, that's your culprit. Replace it with a genuine or high-quality compatible cartridge. Cheap third-party cartridges sometimes deliver inconsistent toner flow, which creates patchy or faded prints.
When you install a new cartridge, follow these steps:
- Power off the printer completely
- Open the toner access panel
- Remove the old cartridge carefully
- Shake the new cartridge side to side five to ten times (this distributes toner evenly inside)
- Insert it firmly until you hear a click
- Close the panel and power the printer back on
- Print a test page
A fresh cartridge should restore normal print darkness immediately. If prints remain faded after replacement, move to the next diagnostic step.
How to Make Laser Printer Print Darker
Your printer has a built-in darkness or toner density setting. If it's set too low, even a full cartridge produces faded output. This is one of the easiest fixes to overlook.
Access the darkness setting through your printer's control panel or driver software on your computer. Look for options labelled "Toner Density," "Print Darkness," "Tone," or "Contrast." Most printers offer a scale from 1 to 10 or Low to High.
Start by increasing the setting by one or two levels. Print a test page. If prints are still faded, increase it again. Keep adjusting until output looks right.
Important note: Setting darkness too high wastes toner and can cause smudging or poor image quality. Aim for the lowest setting that produces clear, readable text and solid blacks. Different paper types may need different settings, glossy paper often requires lower darkness than standard office paper.
If you're using speciality media like card or labels, check the printer manual for recommended darkness levels. Many commercial printing jobs require you to dial in the darkness for each paper type.
Clean the Laser Printer Drum Unit
The drum unit is the component that transfers toner onto paper. Over time, dust, paper fibres, and toner residue build up on the drum surface. This build-up blocks toner transfer and causes faded prints across the entire page or in specific areas.
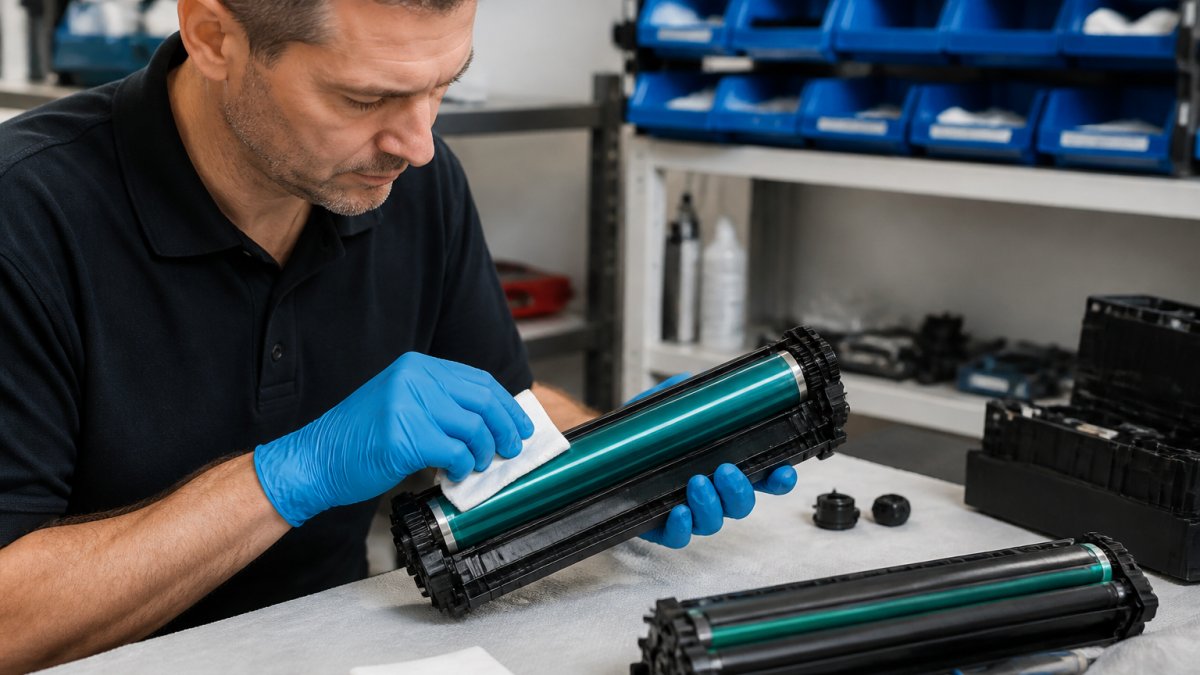
Cleaning the drum unit requires care. You're working with precision optics inside your printer.
Here's how to clean the drum safely:
- Power off the printer and unplug it from the wall
- Allow 10-15 minutes for the fuser unit to cool (it gets very hot during operation)
- Open the printer access panel and locate the drum unit (usually a green or black cylindrical component)
- Gently remove the drum unit by pressing release tabs or levers
- Use a lint-free cloth or soft brush to wipe the drum surface gently in one direction only
- Never use water, solvents, or abrasive materials, these damage the coating
- Reinstall the drum unit carefully, ensuring it clicks into place
- Close the access panel and power the printer back on
Print a test page immediately after cleaning. Faded prints caused by drum buildup usually improve noticeably after this step.
If your printer has a separate toner cartridge and drum unit, you can clean the cartridge area too. Wipe around the cartridge slot with a dry cloth to remove loose toner dust.
Diagnose Faded Laser Prints on One Side
Sometimes faded output appears on only one side of the page, either the left, right, top, or bottom. This pattern tells you something specific is wrong.
Fading on one side usually means:
- The drum unit is partially worn or damaged on that side
- Toner distribution inside the cartridge is uneven
- The fuser roller (which bonds toner to paper) is worn in one area
- Paper is feeding at a slight angle, causing uneven toner contact
Start by printing several test pages. Look for consistent patterns. If fading always appears on the right side, for example, that's a clue the drum or fuser needs attention on that side.
Try these steps in order:
- Shake the toner cartridge again and print a test page
- Clean the drum unit as described above
- Check that paper is loading straight into the tray (misaligned paper feeds at an angle)
- Run the printer's cleaning cycle if it has one (check your manual for this option)
If fading persists on one side after these steps, the drum or fuser roller may be damaged. At this point, professional repair or component replacement is the best option.
Common Mistakes to Avoid When Fixing Faded Prints
Knowing what not to do saves you time and prevents further damage.
Mistake 1: Replacing the cartridge without shaking it first. New cartridges contain toner that settles during storage and shipping. Shaking redistributes it. Skip this step and you'll get faded prints from a brand-new cartridge.
Mistake 2: Cleaning the drum with water or solvents. The drum coating is sensitive. Water leaves residue. Solvents dissolve the coating. Use only dry, lint-free cloths or soft brushes.
Mistake 3: Setting darkness to maximum permanently. Yes, it makes prints darker. But it also empties cartridges faster and can cause smudging. Use the minimum darkness that gives you good output.
Mistake 4: Ignoring paper quality. Low-grade or damp paper doesn't accept toner properly. If you've switched to cheaper paper recently, try standard office paper to rule out a paper problem.
Mistake 5: Not cleaning the paper feed rollers. Dust on the feed rollers causes paper to slide through at an angle. This creates uneven toner contact and faded output. Use a damp cloth to clean the rubber rollers inside the paper tray.
Mistake 6: Running the printer at high temperature without reason. Some older models let you adjust fuser temperature. Higher temperature makes toner stick better, but it also shortens the lifespan of the fuser unit. Use standard temperature unless you're printing on thick media.
When to Call a Professional Technician
You've checked the toner, adjusted darkness settings, and cleaned the drum. Prints are still faded. At this point, professional diagnosis is worth the investment.
Call a technician when:
- Fading persists after cartridge replacement and drum cleaning
- Fading appears in specific patterns that don't match toner or drum issues
- Your printer is under warranty and you want to avoid voiding coverage
- The fuser unit or drum unit needs replacement (this requires technical skill)
- Your machine is showing error codes related to imaging or toner
Professional technicians have diagnostic tools that reveal problems you can't see. They can measure toner density, test the fuser temperature, and inspect the drum for microscopic damage.
Laserprints specialises in resolving these kinds of operational issues for UK manufacturing and print businesses. Our team can diagnose faded prints quickly and supply genuine spare parts if replacement is needed. We offer remote support for initial troubleshooting and rapid on-site service when hardware replacement is necessary. Quick turnaround means your equipment gets back to production faster.
Faded laser printer prints disrupt your production schedule and damage your output quality. Most causes, low toner, worn drums, incorrect settings, are fixable in minutes with the steps outlined above. But when prints stay faded after you've checked the basics, professional repair prevents further damage and gets your machine running at full performance. Laserprints provides expert diagnosis, spare parts, and rapid repair support to keep your printing equipment operating reliably. Shop now → for professional servicing that minimises your downtime.
Frequently Asked Questions
Why is my laser printer printing faded pages?
Faded laser prints result from low toner, a worn or dirty drum unit, incorrect printer settings, or a failing fuser assembly. Low toner is the most common cause, the printer cannot transfer enough pigment to the paper. A contaminated drum or incorrect density settings also reduce print darkness significantly. Check toner levels first, then examine print quality settings before investigating hardware components.
Can a dirty drum cause faint laser prints?
Yes. The drum unit transfers toner to paper, and accumulated dust, debris, or toner residue prevents proper contact. A dirty drum produces uneven, faded output across the entire page or in patches. Cleaning the drum restores consistent print quality. If cleaning doesn't resolve fading, the drum may be worn and require replacement.
When should I replace the laser printer toner cartridge?
Replace the toner cartridge when prints fade noticeably despite adjusting density settings, when the printer displays a low-toner warning, or when the cartridge reaches its rated page yield. Most cartridges last 2,000 to 8,000 pages depending on coverage and model. Continuing to print with depleted toner damages the drum and fuser, so replace promptly when fading appears.
How do I fix faded prints on one side of the page?
One-sided fading typically indicates a drum unit problem, one section is worn or contaminated. Clean the drum thoroughly first. If fading persists on the same side after cleaning, the drum requires replacement. Alternatively, check for paper path obstructions or toner distribution issues. Run a test page after each adjustment to confirm improvement.