

Table of Contents
- Why Colour Calibration Matters in Production Printing
- What You'll Need Before Starting Calibration
- Step 1: Prepare Your Printer and Environment
- Step 2: Create and Apply Your Printer ICC Profile
- Step 3: Run Test Prints and Measure Results
- Best Colour Calibration Tools for Printers
- Common Mistakes to Avoid During Calibration
- Maintaining Colour Accuracy Over Time
- Frequently Asked Questions
Last Updated: September 29, 2026
Why Colour Calibration Matters in Production Printing
To calibrate printer colours is to adjust your printer to reproduce colours as accurately as possible. When your printer isn't calibrated, colours shift, prints look dull or oversaturated, and clients reject batches. For production managers running high-volume operations, this means wasted materials, missed deadlines, and damaged reputation.
The problem compounds quickly. A client orders 500 printed items expecting navy blue. Your uncalibrated printer delivers purple. You've now got a choice: reprint at cost, or ship substandard work. Neither option is acceptable when margins are tight and downtime is expensive.
Calibration solves this. It creates a profile that tells your printer exactly how to translate digital colours into physical ink. Once that profile is locked in, every print matches the last one. Consistency becomes automatic.
At Laserprints, we understand the challenges of colour drift. Businesses that calibrate regularly often see improvements like fewer reprints and faster approval cycles. Those that don't may find themselves troubleshooting more often, wasting stock, and dealing with colour inconsistencies.
This guide walks you through how to calibrate printer colours, covering the entire process. You'll learn what equipment you need, how to create an ICC profile, how to test your results, and how to maintain accuracy over time. Whether you're running a laser printer, DTF system, or UV engine, the fundamentals are the same.
What You'll Need Before Starting Calibration
Essential Equipment and Software
You can't calibrate without the right tools. The bare minimum includes a spectrophotometer (a device that measures colour values), calibration software, and reference media.
A spectrophotometer reads colour patches and converts them into numerical data. This data becomes the foundation of your ICC profile. Without it, you're guessing. Popular options include the X-Rite i1Pro and Datacolor SpyderCheckr, though any device that outputs Lab values will work.
Calibration software interprets the spectrophotometer data and builds your profile. Many printers come with basic software included. Professional options offer more control over how profiles are built and applied.
You'll also need:
- A computer with administrator access to install software and drivers
- Stable internet connection if using cloud-based tools
- USB cable or network connection to your printer
- Test media that matches your production stock (this matters more than people realise)
Reference Materials and Test Prints
Reference materials are your truth source. They show what "correct" looks like. Without them, you're calibrating against nothing.
The most common reference is a colour chart like the IT8 reference chart. These charts contain hundreds of colour patches with known Lab values. When you print them and measure them with a spectrophotometer, you're comparing what your printer actually produced against what it should have produced.
Get reference charts that match your specific printer type and media. A chart designed for inkjet won't give accurate readings on a laser printer. A chart for glossy paper won't work on matte stock.
You'll also need test media: the actual paper, vinyl, or fabric you use in production. Calibration profiles are media-specific. A profile built on glossy photo paper won't work on matte cardstock. If you use multiple media types, you'll need separate profiles for each one.
Step 1: Prepare Your Printer and Environment
Warm-Up and Stabilisation
Printers need time to stabilise before calibration. Cold ink, cold printheads, and unstable temperatures all throw off measurements.
Run your printer for at least 30 minutes before starting. Let it print test pages, anything to get the system warm and the ink flowing. This isn't wasted time. A cold printer will give you a profile that's wrong from the start.
Temperature and humidity matter too. Aim for a stable environment: 20-25°C and 40-50% relative humidity. If your workshop swings between hot and cold, or damp and dry, your calibration will drift. If you can't control the environment perfectly, at least keep it consistent during the calibration process.
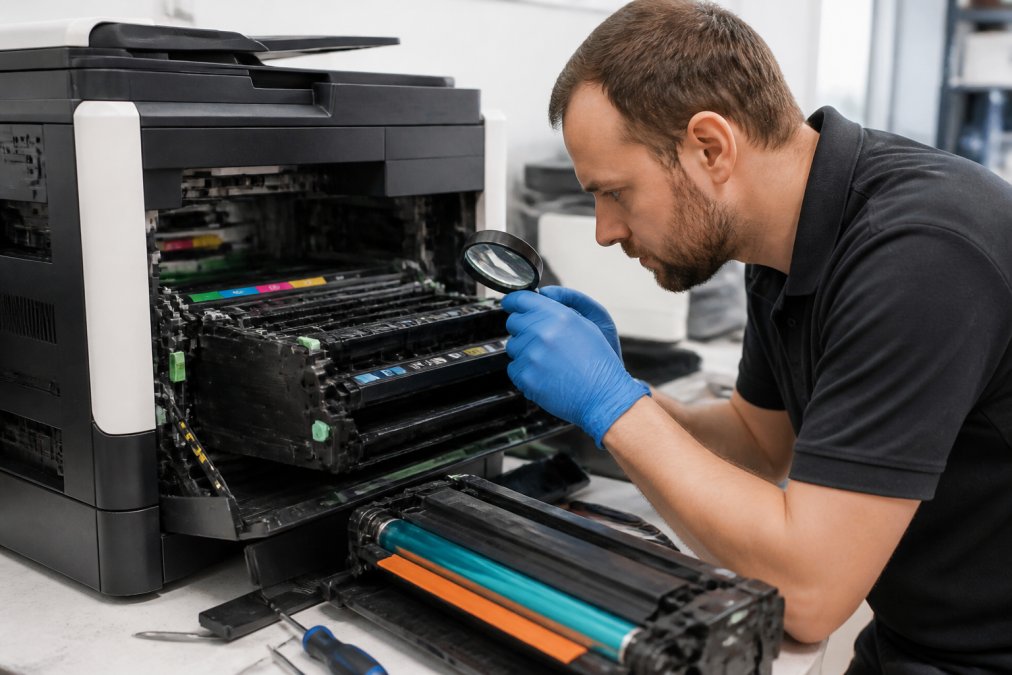
Clean Printheads and Check Ink Levels
Dirty printheads produce inaccurate colours. If nozzles are clogged or partially blocked, ink doesn't flow evenly. You'll get streaks, weak colours, and inconsistent output.
Run your printer's cleaning cycle. Most printers have this built into their menu. Run it once, print a test page, and check for streaks. If you still see lines or gaps, run it again. A second cleaning cycle usually clears any remaining blockages.
Check ink levels too. Low or contaminated ink skews colours. If any cartridge is below 20%, replace it before calibrating. You don't want to calibrate on nearly-empty ink and then wonder why colours shift once you refill.
Also check that you're using the correct ink type for your printer. Mixing ink brands or using incompatible cartridges will throw off your entire calibration. Stick with the manufacturer's recommendation or a trusted third-party option that's specifically designed for your model.
Step 2: Create and Apply Your Printer ICC Profile
Generating Test Charts
An ICC profile is a mathematical map. It tells your printer: "When the software asks for RGB 100, 150, 200, actually print these specific ink values instead."
To build this map, you need test data. You'll print a test chart, usually 100 to 300 colour patches, and measure each one with your spectrophotometer.
Your calibration software generates the chart as a PDF or image file. You print it on your production media using your standard print settings. Don't change settings mid-process. Use the same driver settings, the same media, the same everything you'll use in production.
Print the chart carefully. Make sure the printer isn't running other jobs at the same time. Print speed, temperature, and ink delivery all affect the output. One distraction can ruin the entire test.
Once printed, let the page sit for 30 minutes. Ink needs time to dry and stabilise. Measuring wet ink gives false readings.
Measuring and Building Your Profile
Now you measure every colour patch on your test chart with the spectrophotometer. This takes time, usually 20 to 40 minutes depending on how many patches you have.
The spectrophotometer reads each patch and returns Lab values. Your software compares these actual values against the target values. The differences become the calibration curve.
Your calibration software then builds the ICC profile based on these differences. The profile is essentially a lookup table: "When you ask for this colour, adjust it by this amount to get the right result."
Once the profile is built, install it on your computer and set it as the default for your printer in your RIP software or design application. Some systems apply profiles automatically. Others require manual selection for each print job. Check your workflow to make sure the profile is being used.
Step 3: Run Test Prints and Measure Results
The real test is production output. Print a sample job using your new profile and compare it against a reference or client expectation.
Print a colour-critical image, something with a range of tones, skin tones if possible, and known colours. Print it at your standard production settings and quality level.
Measure the output with your spectrophotometer. Check key colours against your targets. If flesh tones are accurate, greens match, and neutrals are truly neutral, your profile is working.
If colours are still off, you have a few options. You can refine the profile by printing another test chart and rebuilding it with more data. You can adjust individual colour channels in your RIP software if it supports it. Or you can check whether your print settings have drifted, sometimes a driver update or a media change will throw off even a good profile.
Don't expect perfection.
| Step | Duration | Frequency |
|---|---|---|
| Warm-up and head cleaning | 30-45 minutes | Before every calibration |
| Print test chart | 15-20 minutes | Once per calibration session |
| Measure patches | 20-40 minutes | Once per calibration session |
| Build profile | 5-10 minutes | Once per calibration session |
| Test production print | 10-15 minutes | After profile creation |
Best Colour Calibration Tools for Printers
Choosing the right tools depends on your printer type, budget, and accuracy requirements.
Common Mistakes to Avoid During Calibration
Most calibration failures come from overlooking simple details.
Skipping the warm-up. Printing a test chart on a cold printer wastes materials and time. The profile you build will be wrong. Always warm up for at least 30 minutes.
Maintaining Colour Accuracy Over Time
Calibration isn't a one-time task. It's ongoing maintenance.
Print a colour reference sample monthly and visually compare it against your original. If colours are drifting noticeably, rebuild your profile. Don't wait until clients complain.
Frequently Asked Questions
Why do my printed colours look different from my screen?
Screens emit light (RGB) whilst printers use ink (CMYK), creating inherent colour differences. Additionally, monitor settings, ambient lighting, and uncalibrated printer profiles all contribute to mismatches. Proper colour calibration aligns your printer's output to a consistent standard, reducing these discrepancies significantly. Regular ICC profile updates ensure your printer remains accurate as inks and components age.
What is an ICC profile and why is it important for printer ICC profile creation?
An ICC profile is a mathematical description of how your specific printer translates digital colour data into physical ink output. It accounts for your exact printer model, ink type, and paper combination. Creating a custom ICC profile ensures colours print consistently and predictably. Without one, your printer guesses at colour values, leading to unpredictable results and wasted materials in high-volume production.
How often should I recalibrate my printer to maintain colour accuracy?
Recalibrate every 3 to 6 months for production environments, or immediately after replacing ink cartridges, printheads, or paper types. Environmental changes, temperature, humidity, also affect colour output. Businesses relying on consistent colour matching should check calibration monthly. If you notice colour drift between prints, recalibrate sooner. Regular maintenance prevents costly reprints and maintains customer satisfaction.
Do I need specialised software to calibrate my printer, or can I do it manually?
Whilst basic manual adjustments are possible through printer settings, true calibration requires measurement tools and profiling software. Manual methods are imprecise and unreliable for production work. Professional-grade tools like colourimeters paired with profiling software deliver accurate, repeatable results. For businesses where colour consistency directly affects revenue, investing in proper calibration tools and potentially professional services, such as Laserprints' Remote Support Service (£24.99), ensures your investment pays for itself through reduced waste.